Sending SMS messages from Excel
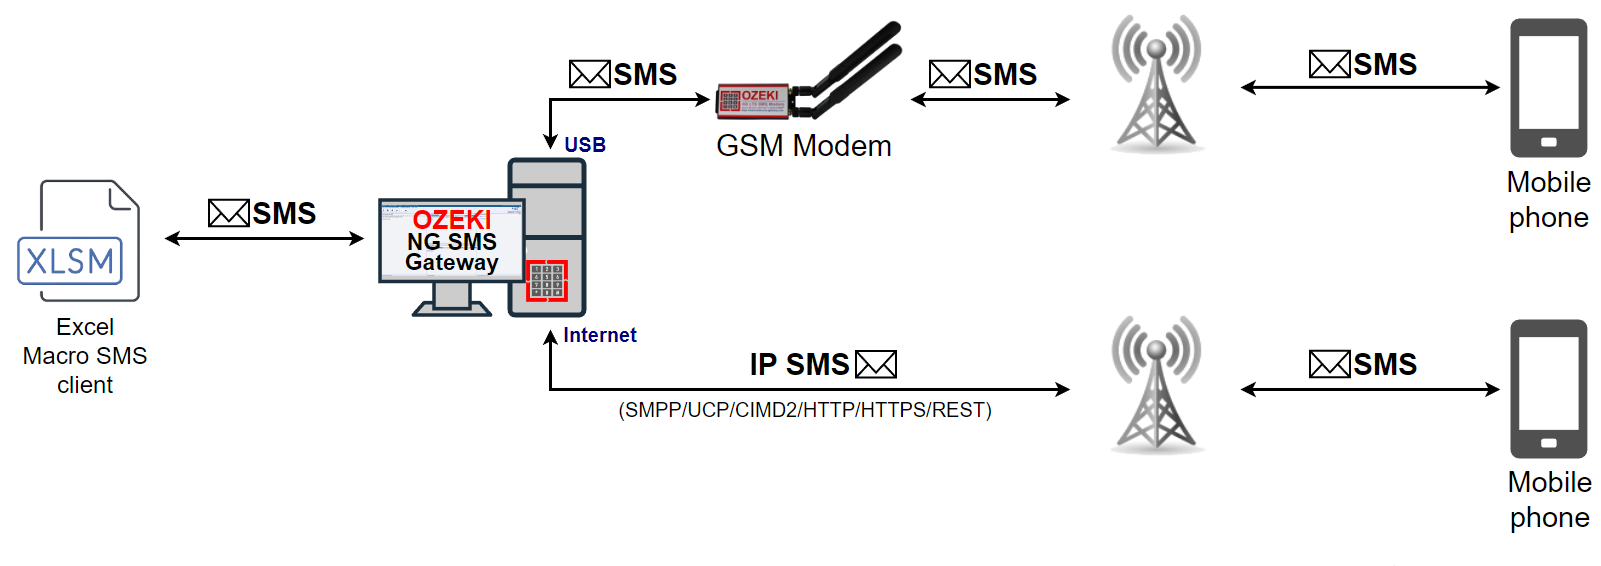
On this page you can learn how to send SMS messages from Excel using the Ozeki NG - SMS Gateway software. You can read a short introduction about the Excel files you need to use, and you are provided with details about the Messages.xls spreadsheet, explaining what each column is for. You can also learn how to configure the Excel macro connection and how to set the appropriate security level in the Excel client file to allow sending messages.
Introduction
The Excel SMS client of Ozeki NG - SMS Gateway enables you to send SMS messages from Microsoft Excel. For this, you just need to open two Excel spreadsheets: Messages.xls and Ozeki.xls. In the Messages.xls spreadsheet, you need to put the telephone numbers in the first and the messages in the second column. To learn what the other columns are for, read the Messages spreadsheet section below.
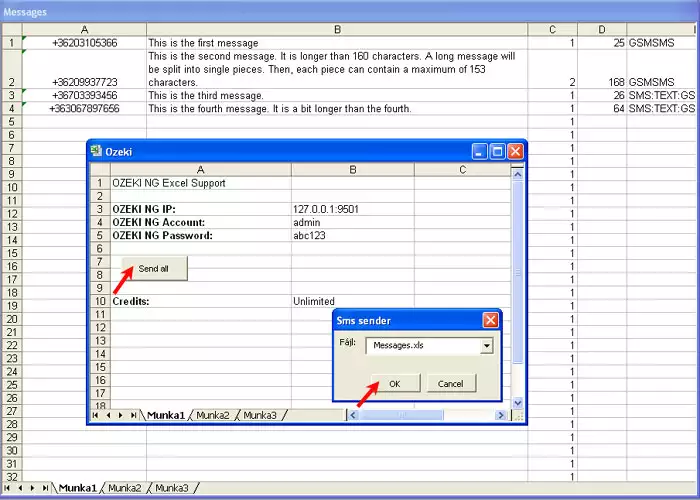
In the Ozeki.xls Excel spreadsheet you will find a macro you can start by clicking the Send all button. This macro will connect to Ozeki NG - SMS Gateway over the office LAN or the Internet and will send the SMS messages you have edited in the Messages.xls spreadsheet. The parameters for this network connection can be edited on the Ozeki.xls spreadsheet.
Using the Excel Client allows you to keep a record of the SMS messages you have sent in an Excel spreadsheet. You can identify which of the messages you have sent belongs to a given telephone number. They are in the same row in the spreadsheet.
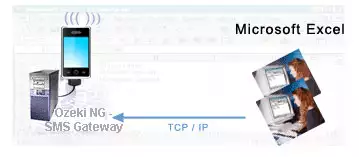
For sending messages, the Ozeki NG - SMS Gateway program and Excel do not need to be on the same computer. You can send messages from different computers in an office network. You just need to enter the IP of the server PC running Ozeki NG - SMS Gateway (Figure 2).
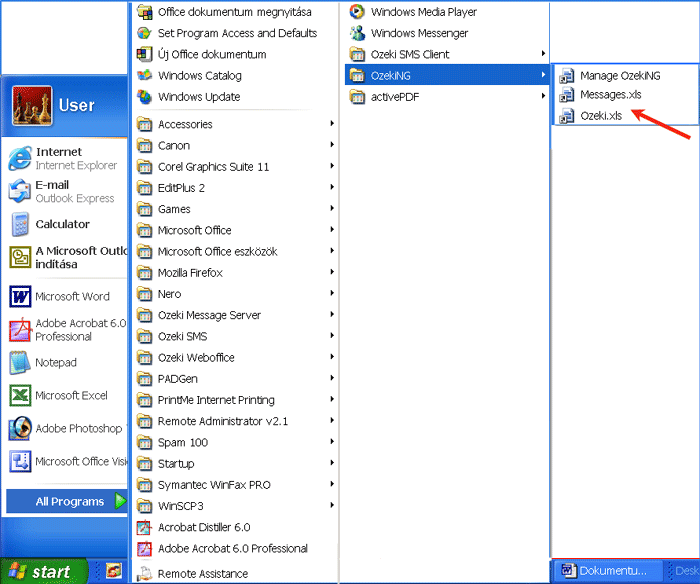
Both Excel files you have to use can be found in the C:\Program Files\Ozeki\OzekiNG - SMS Gateway directory after the program has been installed. (From here, they can be moved to any other folder.) You can also open the Excel files by clicking their icons below the Manage OzekiNG file icon (Figure 3).
The main steps of sending SMS messages from Excel are:
- Creating a list of messages
- Opening the Excel file sending SMS
- Starting the macro sending SMS
- Sending out messages
First, make sure the Ozeki NG - SMS Gateway program has started. If not, start it. (For details, check out the What to do if the service is not running section on the Login problems page.)
Open the Messages Excel spreadsheet for editing the telephone numbers and the texts of the SMS messages. Open the spreadsheet by clicking its icon to do the editing (Figure 4).
Once you have opened this Excel file, you can start entering, in the appropriate cells, all the information required for SMS messages to be sent (Figure 3). In Excel, entering information in or applying a function to a range of cells can be done by typing, copying and pasting or dragging cells.
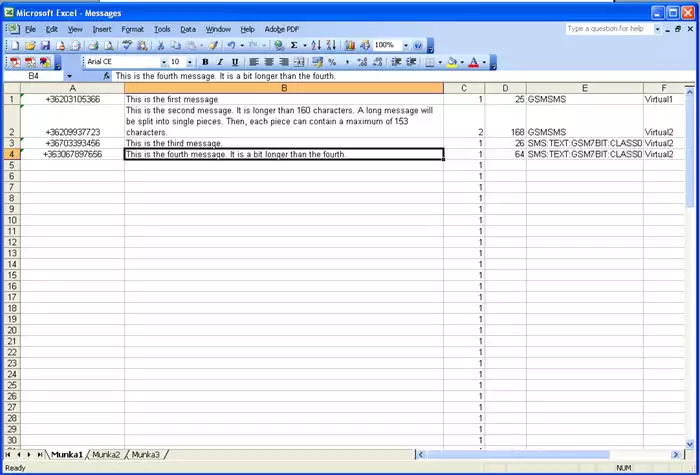
The information related to a message to be sent is in different cells of the same row in the Excel spreadsheet. Some of the information has to be entered/edited manually, and some will be entered/edited automatically. Each cell involved in the editing requires a specific kind of information.
The cell in Column A is for the telephone number you are going to send the message to. Enter the telephone number in international format (starting with + and the country code, without using any spaces).
The cell in Column B is for the SMS message. Note that if a message is longer than 160 characters, it will be sent in two or more parts. A long message will be split into single pieces. Then, each piece can contain a maximum of 153 characters. This is because the information for concatenation needs to be stored in the SMS. Each piece will be sent as a single SMS message. When they reach the destination, the recipient mobile phone will combine them back to one long message.
The number in the Column D cell shows how many characters you have used composing your message. Be careful not to delete the function in the D1 cell. If you happen to delete it, you can copy it from this page and enter it in D1: =LEN(B1)
The Column E cell is for the message type.
The Column F cell is for the name of the service provider connection you use for sending out the message. For information about service provider connections, check out the Service Provider Connections page.
When you have finished editing all the messages to be sent out, open the Excel client. It is automatically installed along with Ozeki NG - SMS Gateway. Do not close the Messages spreadsheet before you open this file. After the messages are edited, the Messages spreadsheet has to stay open along with the Ozeki.xls file.
The Excel client file is - just like the Messages file - in the C:\Program Files\Ozeki\OzekiNG - SMS Gateway directory. To start the Excel client, double-click Ozeki.xls. (You can click it after opening the C:\Program Files\Ozeki\OzekiNG - SMS Gateway directory or clicking the file icon (see Figure 2 above). This file contains an Excel macro that can be started by pressing the Send all button. This macro will connect to Ozeki NG - SMS Gateway over the office LAN or the Internet and will send the SMS messages you have edited in the Messages spreadsheet. The parameters for this network connection can be edited in the Ozeki.xls spreadsheet (Figure 5).
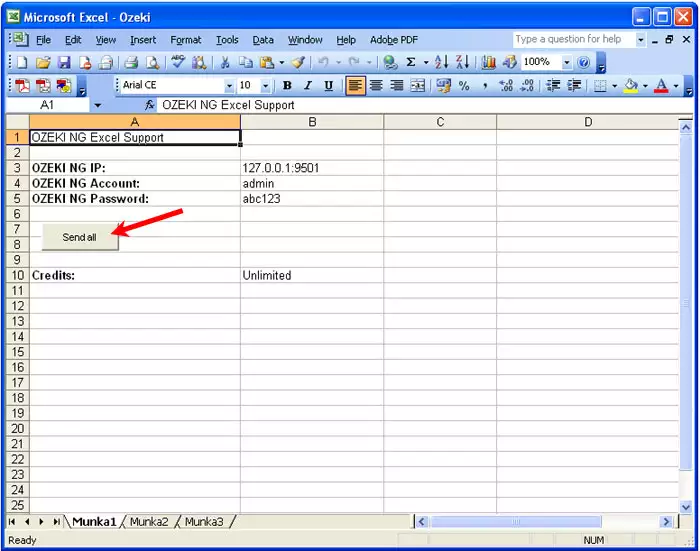
When you have opened the file, click on the Send all button. Then, the Message Server will send out the messages if the Excel macro connection is already configured and the security level is appropriate. If Excel's security level is not appropriate, i.e. Very high or High, for sending messages, you can see one of the following messages (Figure 6, Figure 7):


Then you should change the security level to Medium or Low. Select the Tools/Macro/Security menu item. In the Security Level tab, select Medium or Low (Figure 8).
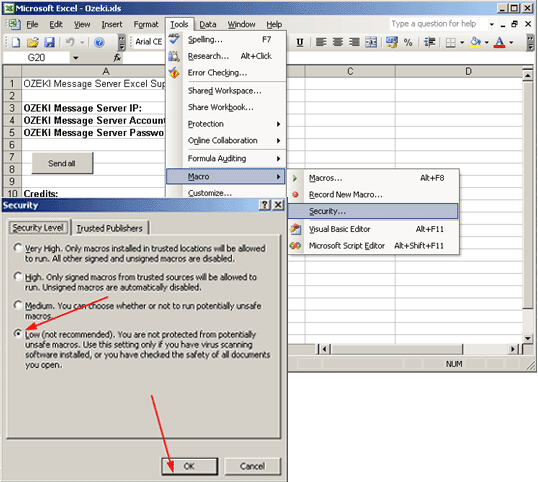
If the security level is Medium, you receive the following message (Figure 9):
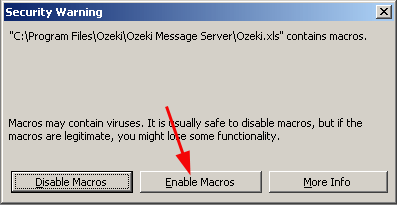
Click the Enable Macros button. To configure the Excel macro connection (Figure 10), specify the IP address and the server port of the computer, divided by a colon. Also, specify the server account and the password.
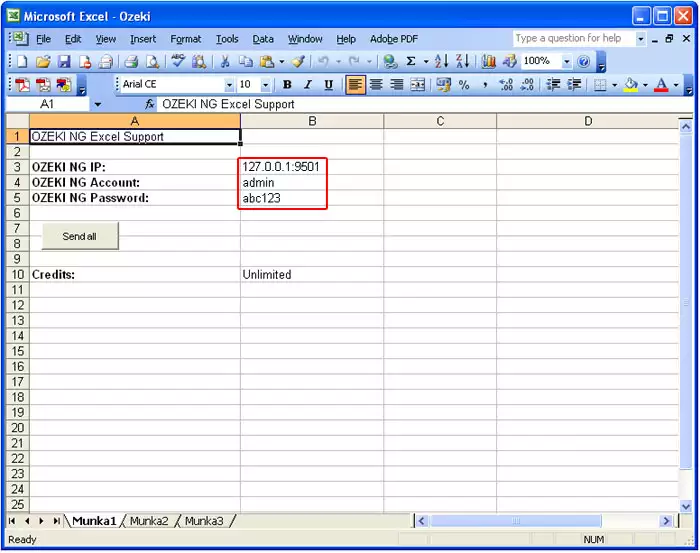
You only have to do this once, and the next time you want to send messages, you just need to click the Send all button. If you have created a different user in the Message Server, specify the username and the password. After Credits, in the column B cell you can specify the maximum number of SMS messages a user can send out. When you have finished the configuration, click the Send all button. Then the SMS sender window will show up. It contains a drop-down menu of open Excel files to be processed. Select the one(s) containing the messages to be sent out, and click OK (Figure 11).
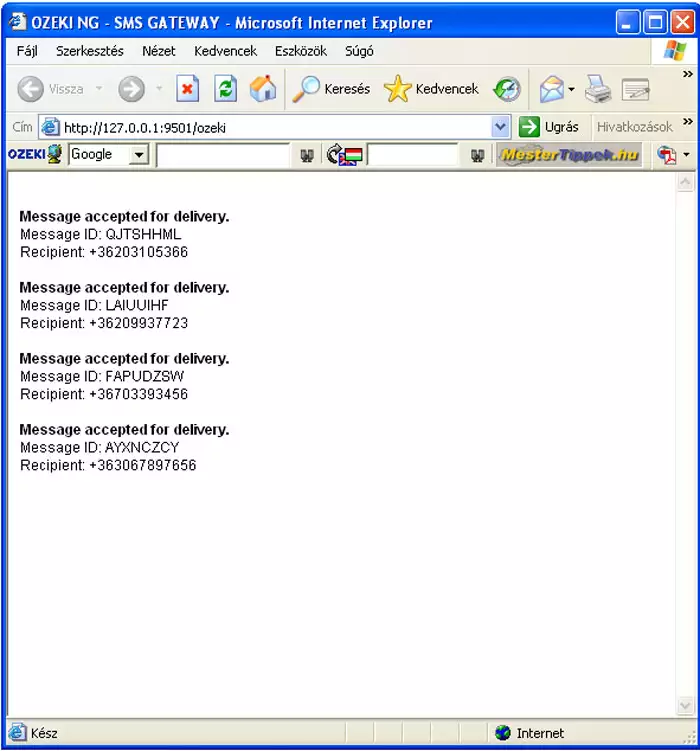
After clicking OK (and sending out the messages), a new browser window will open, containing a list of the messages that have been sent, displaying if they have been accepted by Ozeki NG - SMS Gateway for delivery (Figure 12).
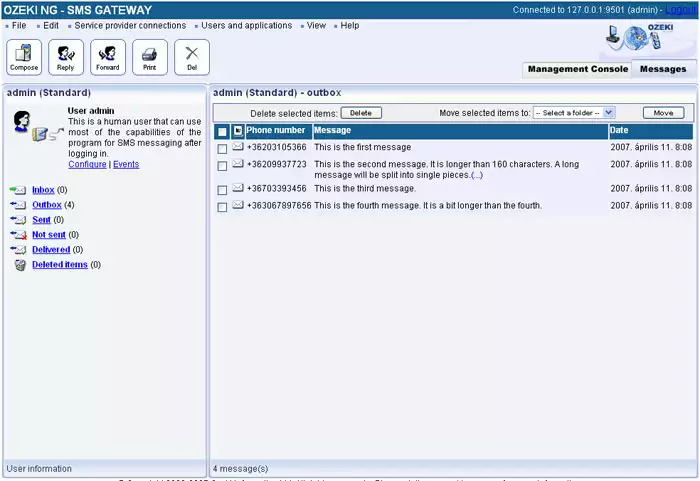
After the messages have been sent, you can check their status by opening the sender's user account. To find out how to open a user account, check out the Users and Applications page. The screenshots on this page illustrate sending SMS messages from the admin user's account (Figure 13).
More information

 Sign in