E-mail User
This chapter provides an introduction to the E-mail user. You can learn what it can be used for, and how to install it using the graphical user interface of the Ozeki NG - SMS Gateway software. You are also provided with links to respective pages instructing you how to configure it to send an e-mail as an SMS message and to send an SMS message as an e-mail.
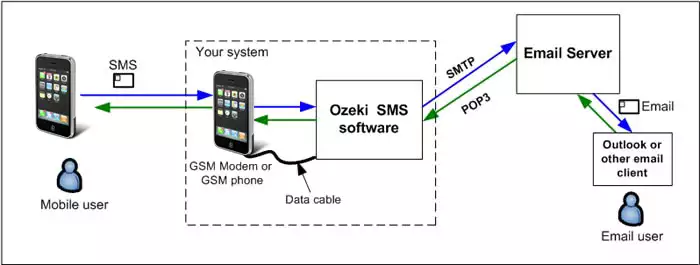
Ozeki NG - SMS Gateway allows, among others (see the Users and Applications page), the installation and configuration of an E-mail user. This is an automated user that can be used to realize two-way e-mail - SMS gateway service. It can forward an incoming e-mail as an SMS message to a specified phone number (or phone numbers), and an incoming SMS message as an e-mail to a specified e-mail address or e-mail addresses (Figure 1).

The Ozeki NG - SMS Gateway software acts as an e-mail client, using an SMTP server to send, and a POP3 server to receive messages. You can use its graphical user interface to install and configure an E-mail user.
For detailed instructions on how to realize a two-way E-mail - SMS gateway service and a detailed explanation of Figure 1, check out the How to Set up an E-mail - SMS Gateway page.
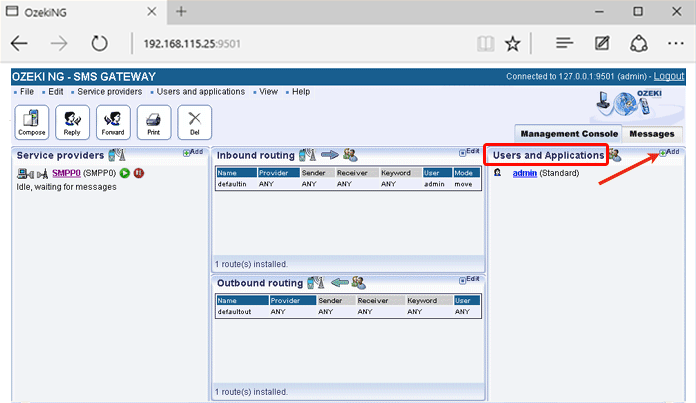
To start installing and configuring an E-mail user, click the Add button in the top right-hand corner of the Users and Applications panel on the right of the Management Console. You can also add a user by clicking the Add user item in the Users and applications menu (Figure 2).

This will bring up an interface consisting of two panels.
- The panel on the left contains a list of users that have been installed. In the bar at the bottom of the panel you can read how many users have been installed.
- The panel on the right contains a list of users that can be installed.
- Each user in the left-hand panel is listed with a unique name (and the user type stated in brackets).
- Each user in the right-hand panel is listed with the name of its type and a brief description of what it can be used for.
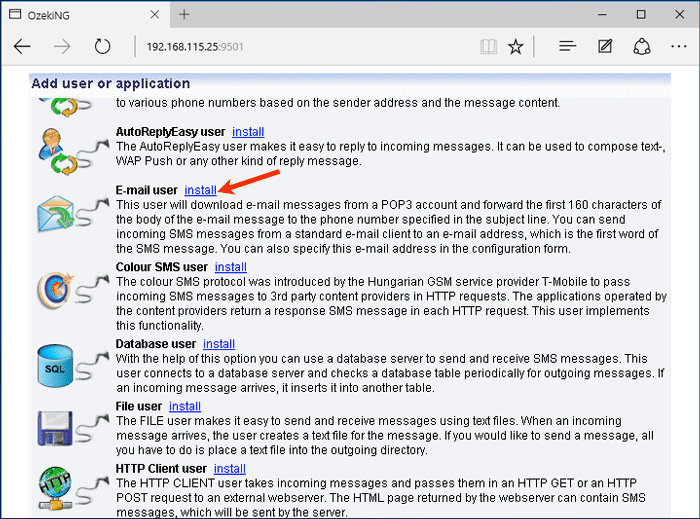
To start installing an E-mail user, click the Install link in the respective entry in the list (Figure 3).

When installing a user (type), you need to give it a unique username. Clicking the Install link will bring up the E-mail user installation panel. Here, you need to enter a unique username in the Username field.
After specifying a unique username for the E-mail user, the E-mail to SMS tab of the Configuration panel will show up. Now you can start to configure the user. To find out how to configure it to forward an incoming e-mail as an incoming SMS message to a specified phone number, check out the E-mail to SMS Configuration page. To learn how to configure it to send an incoming SMS message to a specified e-mail address, read the SMS to E-mail Configuration page.
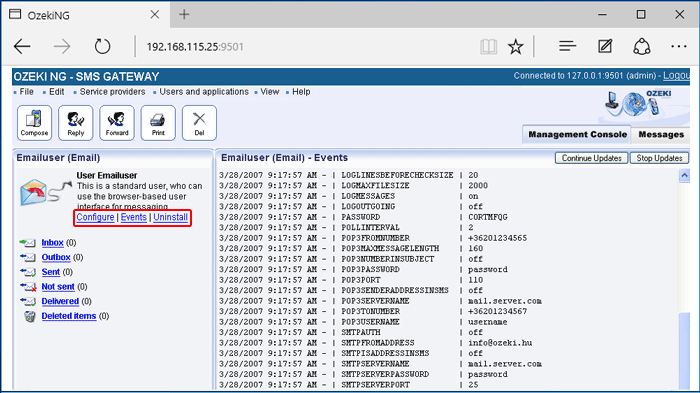
To modify the configuration or to view server events related to an installed user, open the panel of the user's account. To do this, click the name of the user in the Users and Applications panel of the Management Console. In the panel of the user's account, click the link of the task you wish to perform (Figure 4).

