Installing IIS on Windows XP Pro
If you are running Windows XP Professional on your computer, you can install Microsoft's web server, Internet Information Server 5.1 (IIS) for free from the Windows XP Pro installation CD and configure it to run on your system by following the instructions below:
1. Place the Windows XP Professional CD-Rom into your CD-Rom Drive.
2. Open 'Add/Remove Windows Components' found in 'Add/Remove Programs' in the 'Control Panel'.
3. Place a checkmark in the checkbox for 'Internet Information Services (IIS)' leaving all the default installation settings intact.
4. Once IIS is installed on your computer, you can view your home page in a web browser by typing 'http://localhost' (you can substitute 'localhost' for the name of your computer) into the address bar of your web browser. If you have not placed your web site into the default directory, you should now be looking at the IIS documentation.
5. If you are not sure of the name of your computer, right-click the 'My Computer' icon on your desktop, select 'Properties' from the shortcut menu, and click the 'Computer Name' tab.
6. Your default web directory to place your web site in is 'C:\Inetpub\wwwroot', but if you don't want to overwrite the IIS documentation found in this directory, you can set up your own virtual directory through the 'Internet Information Services' console.
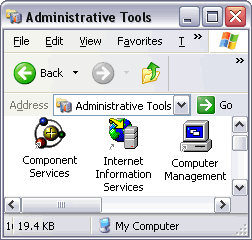
7. The 'Internet Information Services' console can be found in the 'Administration Tools' in the 'Control Panel' under 'Performance and Maintenance', if you do not have the control panel in Classic View.
8. Double-click the 'Internet Information Services' icon.

9. Once the 'Internet Information Services' console is open, you will see any IIS web services you have running on your computer including the SMTP server and FTP server, if you chose to install them with IIS.
10. To add a new virtual directory, right click 'Default Web Site' and select 'New', followed by 'Virtual Directory', from the drop down list.
11. Next, you will see the 'Virtual Directory Creation Wizard' from the first screen. Click the 'next' button.
12. You will then be asked to type in an 'Alias', by which you will access the virtual directory from your web browser (this is the name you will type into your web browser after 'localhost' to view any web pages you place in the directory).
13. Next, you will see a 'Browse...' button, click this to select the directory your web site pages are in on your computer. Then, click the 'next' button to continue.
14. In the final part of the wizard you will see a series of boxes. If you are not worried about security, select them all. If you are, and you want to run ASP scripts, then check the first two, followed by the 'Next' button.
15. Once the virtual directory is created, you can view the web pages in the folder by typing 'http://localhost/aliasName' (where 'aliasName' is, place the alias you called the virtual directory) into the address bar of your web browser (you can substitute 'localhost' for the name of your computer if you wish).
Source: webwizguideThe original article can be found at: http://www.webwizguide.com/asp/tutorials/installing_iis_winXP_pro.asp
