C#.NET SMS API
This page gives you information on how you can use C# to send/receive SMS messages. A C#.NET SMS demo project is provided with full source code, that illustrates how to connect to Ozeki NG - SMS Gateway. The demo project makes it possible to send/receive SMS messages using a GSM Modem or an IP SMS connection, such as SMPP, CIMD2 or UCP/EMI. In my previous article ( How to send SMS messages from C# using an SQL database ) I have explained how you can send/receive SMS messages from C# using databases. The information I present here is useful if you would like to Interface directly with the SMS gateway without a database server.
Prerequisites
To get started using this C#.Net example, you need to download the example project by clicking on the following link. In this zip file you will find the source code of the project explained in this document.
| Download: | CsNETDll-v3.zip (57,3 Kb - Updated 22.07.2010.) |

Introduction to the C# SMS API
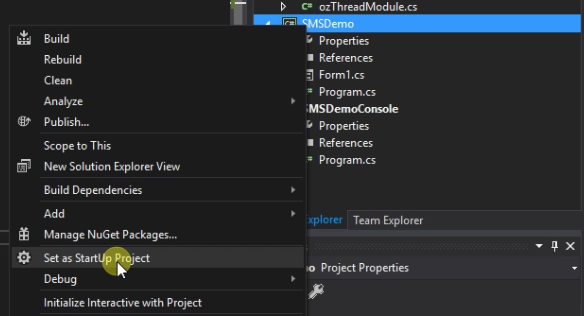
The C# SMS API is a client software, that can be used to connect to Ozeki NG - SMS Gateway directly to send and receive SMS messages from any C#.NET application. The API can be used to connect locally or remotely (over a LAN or the Internet) to the SMS Gateway. The API provides a classic example on how to use the .NET TCP/IP networking to make two applications (Your application and the SMS Gateway) work together. It uses the advantages provided by IP connectivity to create a client-server model. The API comes with an example. The C# SMS example is a working GUI application that can be used to send and receive SMS messages to get information about delivery status (Figure 1).

How to use the C# SMS API
To use the C# SMS API you must have a working installation of Ozeki NG SMS
Gateway
in your system. To get a working installation, you need to follow the steps
in the Ozeki SMS Gateway installation guide and
the steps in the SMS quick start guide
to verify if sending and receiving works.
After you have a working SMS gateway, you can
download
and extract the C# SMS client. Note, that Ozeki NG SMS Gateway does not
necessary have to be installed on the same computer where your C# SMS
application
is running. You can have Ozeki NG SMS Gateway on one computer and you can use
Visual Studio to build your C# SMS application on a different computer.
The C# SMS API reference
The C# SMS API provides methods that allow you to send various message types,
such as WAP Push, Flash SMS, Ringtones, VCard, VCalendar, etc. It also
has events that help you track your SMS messages. For example you can subscribe
for a notification about when a message was delivered to the network and
when a message was delivered to the handset. The C# SMS API can also be
used to receive SMS messages. This gives you the option to create applications
like SMS voting, quiz games, or stock market data querying quickly. A complete
documentation of the C# SMS API is available on the following webpage:
C# SMS API Reference
Alternatively you might find the following guide useful:
How to send and receive SMS messages
from C# using an SQL compatible database
Server side configuration
In order to use the C# api, you need to configure the SMPP server in Ozeki NG SMS Gateway. You will need to setup an SMPP user account that can be used by the C# client to send and receive SMS messages.


Client side configuration
Once you have created the server side configuration, you need to enter the appropriate server details into the code of the C# SMS client. You will enter the IP address and port of the server, and the username and password.

Testing your code
You can test your code and send your first message by launching the project in Visual Studio. Simply click on the build button, and the application will start.


Reading the logs
After sending your first SMS messages, we recommend you to read the logs in the Ozeki NG SMS Gateway user interface. You can do this by opening the details page of the SMS gateway.


How to specify the validity period for your messages
Ozeki NG SMS Gateway allows you to send SMS messages from various applications. If you use C# SMS API for sending messages, you can set the
validity period for your messages. For specifying the validity period, please use
the following parameter:
&vp=2022.07.26.+10%3A07%3A58 |
Please note that 2022.07.26.+10%3A07%3A58 is the Urlencoded form of 2022.07.26. 10:07:58.
With the use of this parameter, you can send validity information to the service provider. Therefore, the service provider can set messages to be valid for the specified period.
FAQs
What is an API?
An API is like a set of instructions that allows different software programs to talk to each other. This lets you easily connect features from other programs to build your own applications.
An API (Application Programming Interface) acts as a messenger between your software and external tools or services. It provides instructions and building blocks for applications to interact with each other.
An API offers a defined way for applications to communicate. It exposes functionalities (routines, object classes) and data (data structures) from libraries or operating systems through protocols, allowing developers to integrate these features into their own applications.
What APIs do you provide?
This software makes it easy for developers to connect to its features. It provides APIs (like instructions for different programming languages) for tasks like:
- Using databases (SQL API)
- Sending texts (E-mail API)
- Working with files (File API)
- Connecting to the SMS gateway (built-in SMPP server)
These APIs, along with provided examples, allow developers to easily integrate this software's functionalities into their own applications.
More information