How to query the SMS traffic of a user
This guide explains how to set the SQL reporting function and route tables of Ozeki NG SMS Gateway to determine how many SMSs have been sent out by a user and which service provider connection has been used for sending messages. Follow the configuration guide below to setup this function successfully.
In Ozeki NG SMS Gateway you can assign credits to a user. In this way the amount
of messages that can be sent by one user is determined by the number of these credits.
However there are cases when messages are purchased from various service providers
with different prices. In these cases it is important to be able to follow
how many messages have been sent out and which service provider connections have
been used by users.
To determine how many messages are sent and which service provider connection is used
by users you need to do the follows: set the SQL reporting function and the outgoing
route tables in Ozeki NG SMS Gateway software.
For this purpose you need to specify the service provider connections exactly in the
outgoing route tables. It means that ANY cannot be used for determining the service
provider in the route table.
Service providers use various areacodes. In this way it is possible to specify
the route for SMS messages according to these areacodes. In the example below we
use two service provider connections and two users for demonstration. After configuration
we query how many messages have been sent via one service provider within
a specific period by a given user.
Configuration guide
It is assumed that you have already done the follows:
- Ozeki NG SMS Gateway has been installed to the PC
- A database server can be accessed from the PC or a database server is
installed on the PC on which Ozeki NG SMS Gateway runs. You have also set the
databases you wish to use (database of SQL report and the database for
Database user). In this example we use a MySQL server installed on the PC on which Ozeki
NG SMS Gateway runs
- The necessary ODBC driver through which you can connect to the database is
installed on the PC on which Ozeki NG runs
- You can connect to the service provider (you have already signed up for their service)
Step 1 - Start Ozeki NG SMS Gateway
To start configuration first start Ozeki NG SMS Gateway software (Figure 1).

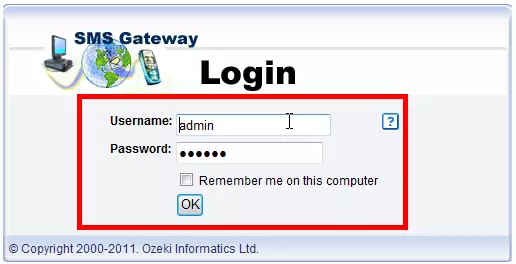
Log into Ozeki NG SMS Gateway with your username and password (Figure 2).
Step 2 - Configure service provider connections
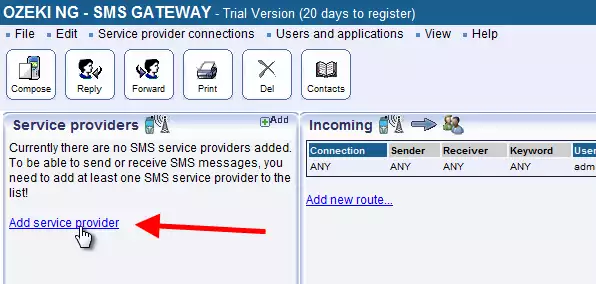
To add a new service provider connection click on Add service provider (Figure 3). In this example we add two SMPP service provider connections called "TMOBILE" and "VODAFONE" for demonstration.
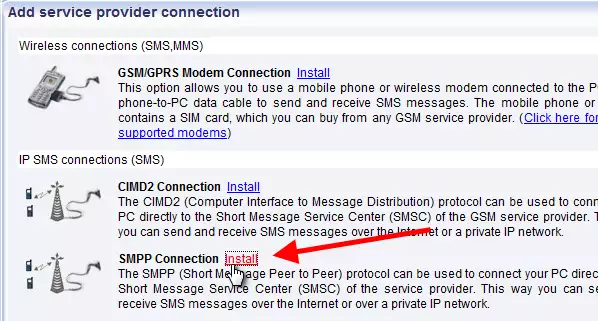
To install an SMPP connection click on Install (Figure 4).
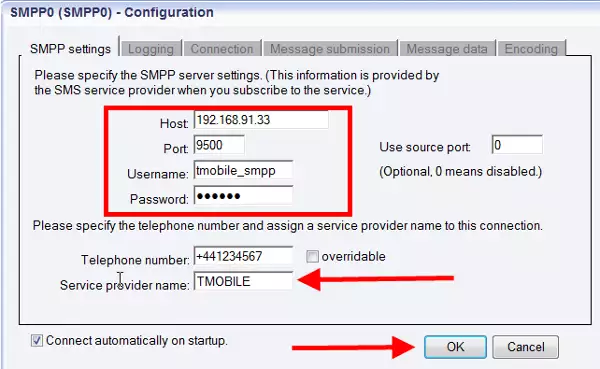
On the configuration panel of SMPP connection select SMPP settings tab to specify the SMPP server settings. These parameters are provided by your service provider (Figure 5). It is highly recommended to give an easily identifiable name for the created service provider connections. It is important to be able to identify them in the routing tables later.
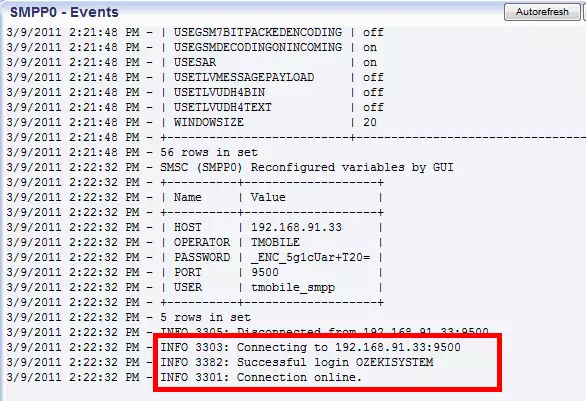
You can check if the SMPP connection configuration is successful in Events menu. If the configuration is correct you receive Connection online response (Figure 6).
On Figure 7 you can see the two installed service provider connections called TMOBILE and VODAFONE. For a detailed guide on how to configure SMPP service provider connection please visit SMPP configuration page.
Step 3 - Configure users you wish to use
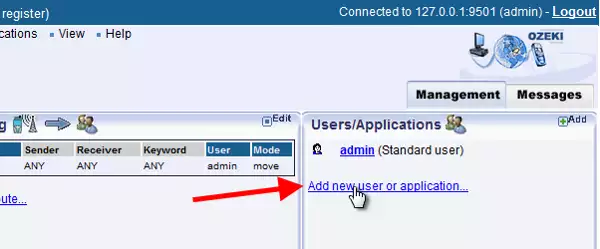
Now we create two users (a standard user and a database user) to demonstrate how this solution works in practice. To create a new user click on Add new user or application (Figure 8).

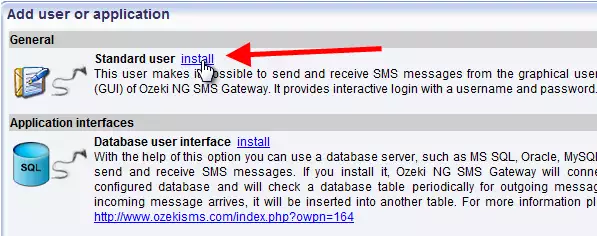
Click on Install next to the selected user (Figure 9).
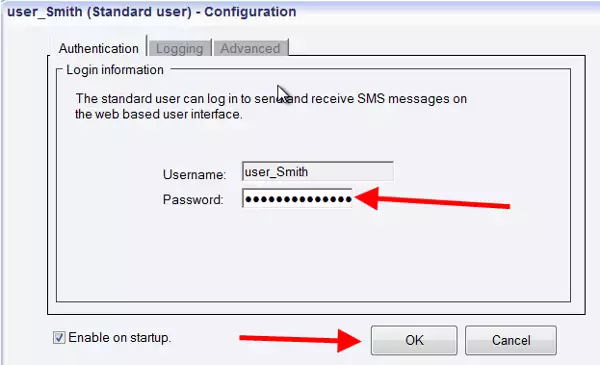
Provide a name for the user (Figure 10).

Specify a password for the standard user for login (Figure 11).
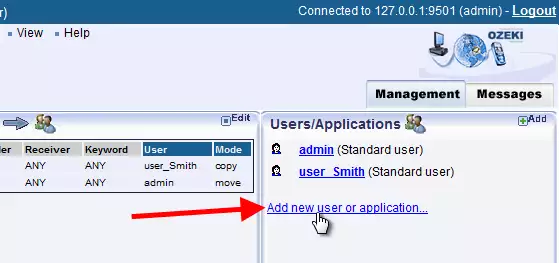
Now we create a database user, as well, by clicking Add new user or application (Figure 12).
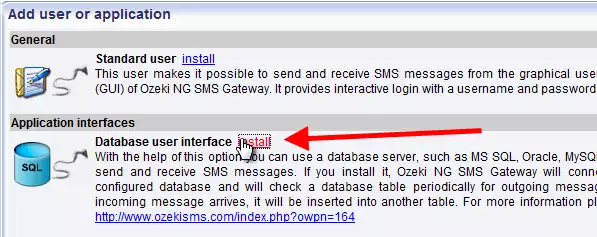
Install the Database user (Figure 13).
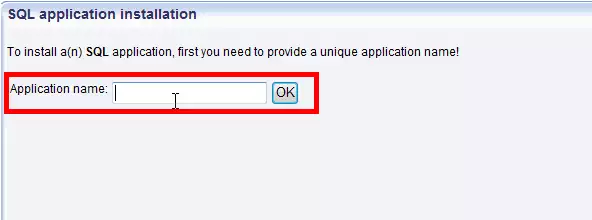
Provide a name for this user. Please note: this name will also be used to identify this user in the database. It is recommended to give an easily identifiable name (Figure 14).
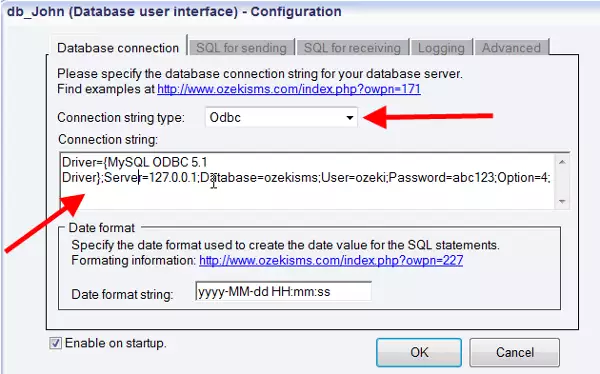
On the Configuration panel of Database user select Database connection tab. Select the Connection string type via which you want to connect to the database (e.g.: ODBC). Then specify the Connection string (Figure 15).
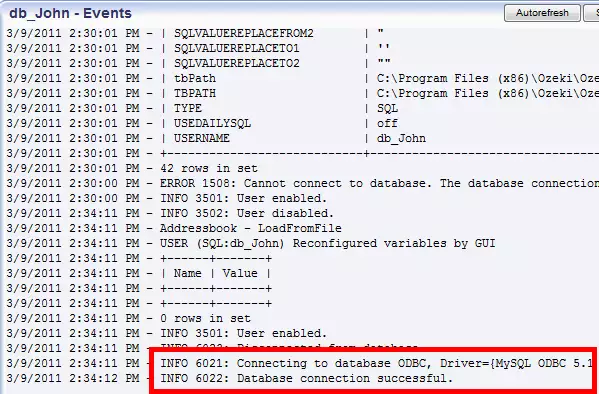
If the configuration is correct you can see Database connection successful response in Events (Figure 16). For more detailed guide on how to configure Database user please visit Database user configuration page.
Step 4 - Configure outgoing route tables
For setting outgoing route tables click on Edit in the Outgoing route section (Figure 17).
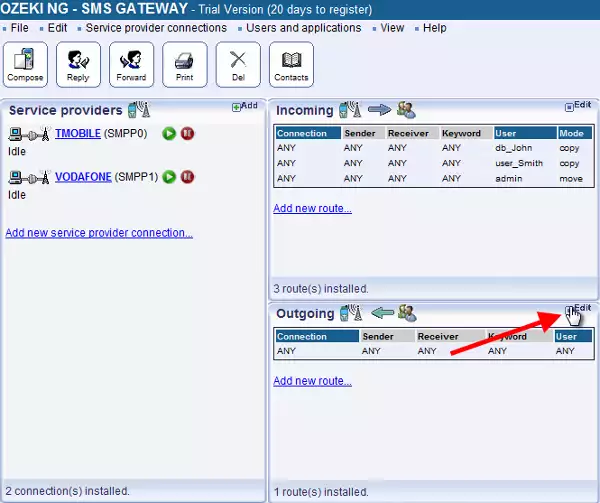
Delete the default route by clicking on Del (Figure 18). This step is necessary because there cannot be any route where the service provider is determined as ANY.

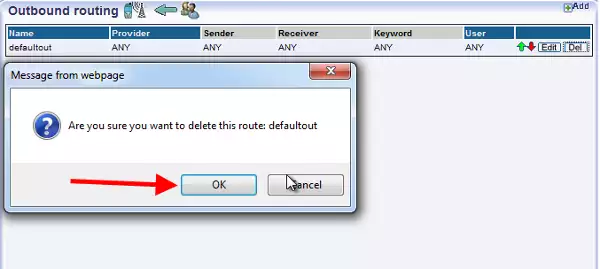
The program will ask if you are sure in deleting the default route. Click on OK (Figure 19).
Click on Add new route (Figure 20).

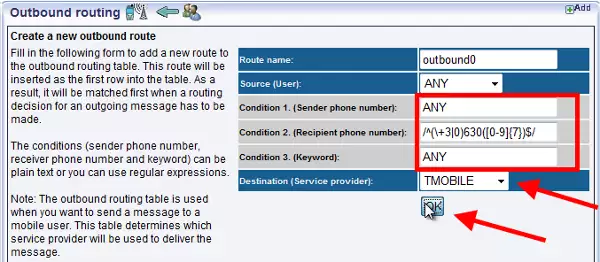
Now specify which service provider connection will be the destination (Figure 21). In this
example it is TMOBILE. With a regular expression you can also determine a condition for the
recipient phone number.
In this example we have specified a condition to send SMS messages
to the connection TMOBILE if the recipient phone number starts with +3630 or 0630 areacode. This areacode
belongs to TMOBILE Hungary.
In this way you can determine the areacode for the given service provider for sending
messages via this connection. Please note:
these areacodes are varied by countries and service providers. Please ask your service provider
about their areacodes!
For adding another route click on Add new route (Figure 22).

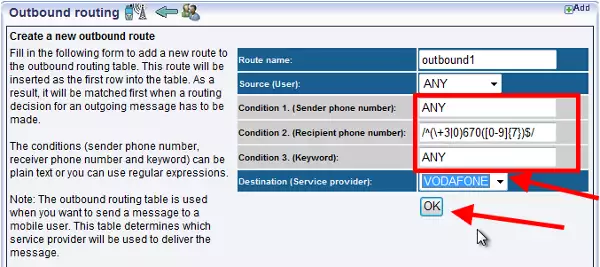
In this example we set VODAFONE as the Destination of this outgoing route (Figure 23).
Here we also specify a condition to send messages to the connection VODAFONE if the recipient phone number starts with
+3670 or 0670 areacode. This areacode belongs to VODAFONE Hungary.
Please note:
these areacodes are varied by countries and service providers. Please ask your service provider
about their areacodes!
Step 5 - Configure SQL reporting
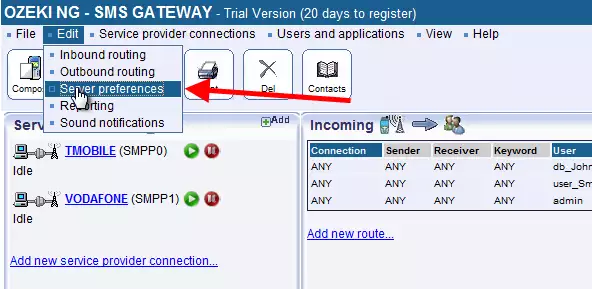
To set SQL reporting go to Edit menu and select Server preferences menu item (Figure 24).
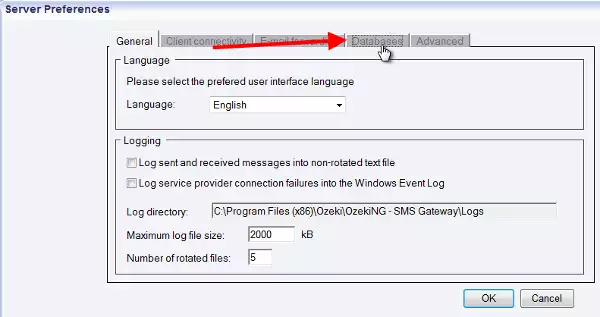
Click on Databases tab (Figure 25).
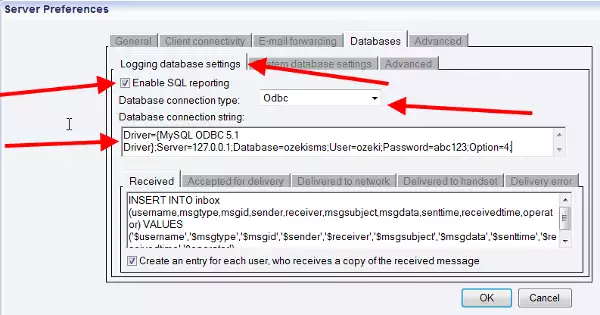
Click on Logging database settings tab and check Enable SQL logging checkbox. Select the Database connection type (in this example it is ODBC) and customize Database connection string (Figure 26). For a more detailed guide on how to enable SQL logging please visit SQL logging page.
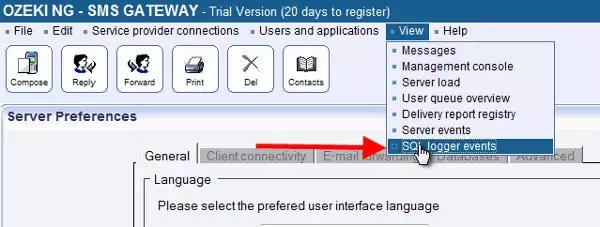
To check the database connection click on View menu and select SQL logger events menu item (Figure 27).
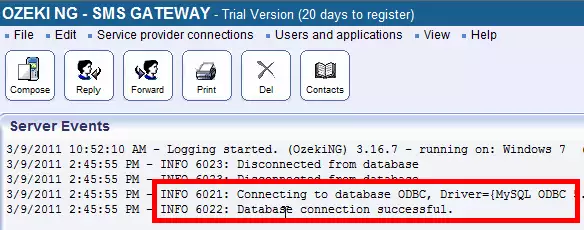
If the configuration is correct you can see Database connection successful response (Figure 28).
Now the configuration part is completed. In the follows you can
find a demonstration on how to query the sent messages from the system.
Figure 29 demonstrates that one user sent 5791 messages.
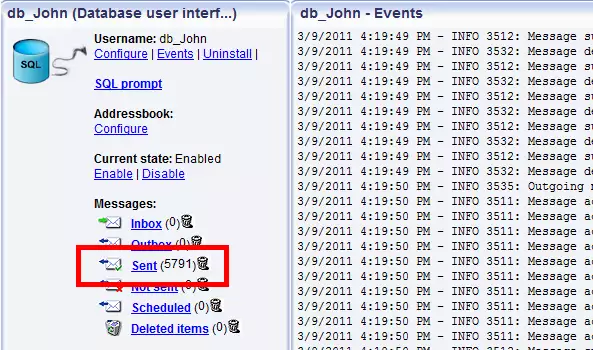
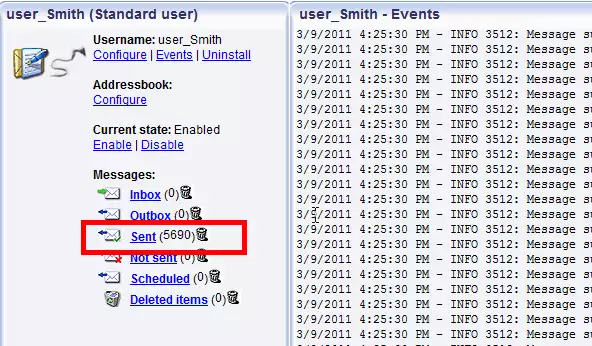
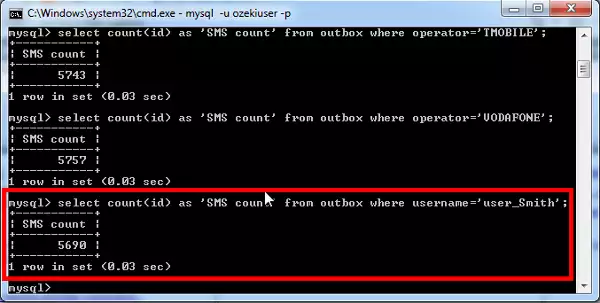
Figure 30 demonstrates that another user sent 5690 messages.
Step 6 - Use the respective commands in MySQL console to query data
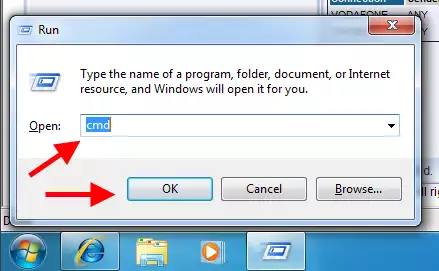
As a next step open Run window. You can do so by pressing the Windows button + R button on your keypad. Enter cmd and click on OK (Figure 31).
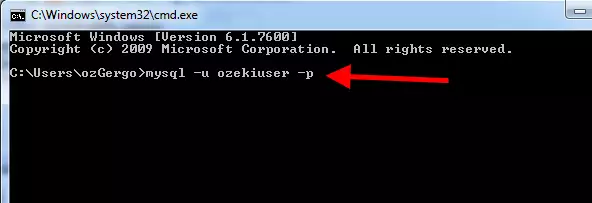
The Commandline of Windows starts. Now start MySQL console with the
following command (Figure 32):
mysql -u ozekiuser -p-p is required if you use a password
ozekiuser is the username with which you connect to the database
Finally push Enter
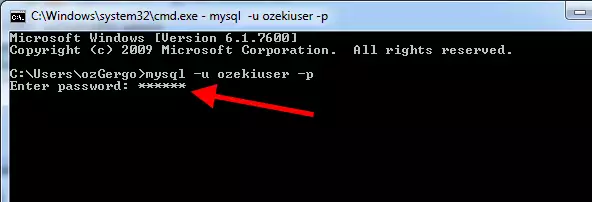
In case you use a password you need to type this password into the commandline (Figure 33).
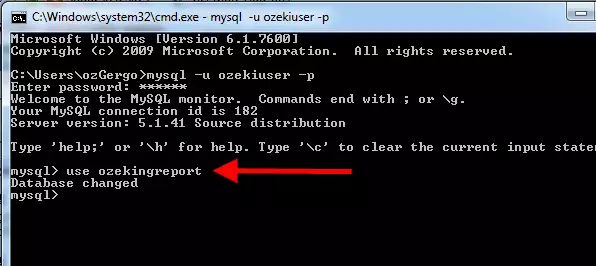
MySQL console starts. To use Database Report use the
following command (Figure 34):
use + database nameHere you need to replace the name of the database in which the report has been created. In this example, the report has been created in ozekingreport database. In this way we use the command:
use ozekingreport
It responds Database changed.
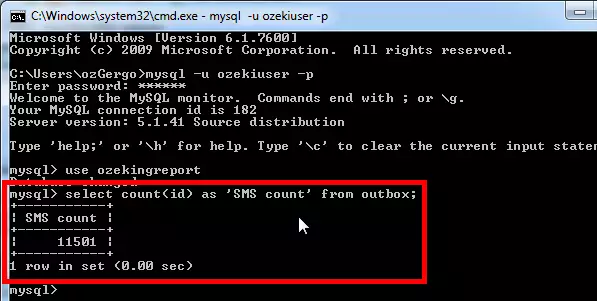
First we query the total number of sent messages with the following
SQL command (Figure 35):
select count(id) as 'SMS count' from outbox;
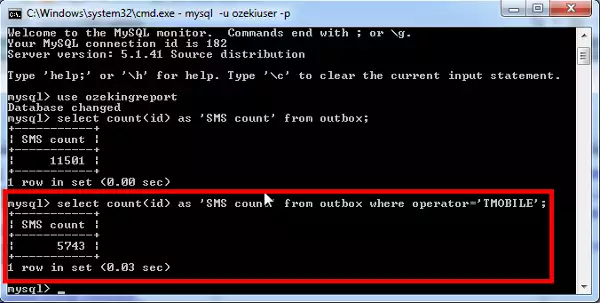
To query the total number of sent messages via one given service provider connection use
the following SQL command (Figure 36):
select count(id) as 'SMS count' from outbox where operator='operator_name';
To query the total number of messages that have been sent by one
given user use the following SQL command (Figure 37):
select count(id) as 'SMS count' from outbox where username='user_name';
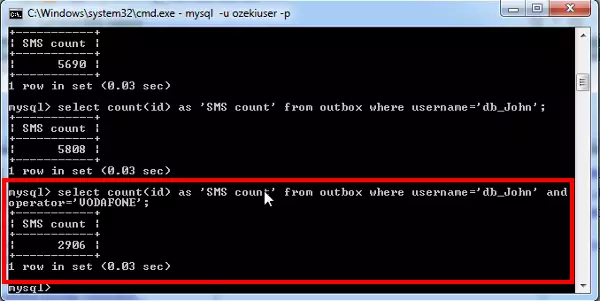
To query the total number of sent messages via one given service
provider connection by one given user, use the following SQL command (Figure 38):
select count(id) as 'SMS count' from outbox where username='user_name' and operator='operator_name';
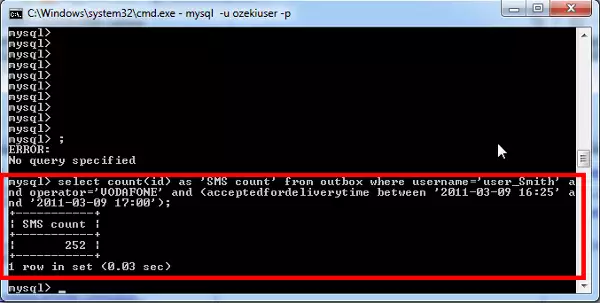
To query the total number of sent messages via one given service
provider connection by one given user within a specific period, use
the following SQL command (Figure 39):
select count(id) as 'SMS count' from outbox where username='user_name'
and operator='operator_name' and (acceptedfordeliverytime between '2011-03-09 16:25' and '2011-03-09 17:00';)
In conclusion...
With this solution you can follow the total number of sent messages via a given service provider connection by a given user within a specific period of time. In this way it is possible to use this solution for billing purposes. You can create invoices based on the total number of sent messages within a given time period. It is useful even in cases if the prices of sent SMS messages are varied according to the price plans of the various service providers. If you have any question please contact us at info@ozekisms.com
How do you set daily and monthly message throughput limits for SMPP Clients and other users (SQL user, E-mail users, etc.)?
The credit limit feature offers flexibility in controlling user message quotas. However, it's important to choose the time period that best suits your needs. Available Periods:
- Daily: Define a daily limit for the number of messages a user can send. This is ideal for scenarios requiring strict daily control.
- Monthly: Set a monthly message allowance for each user. This provides more flexibility while ensuring users don't exceed their quota within a month.
The credit limit functionality offers further customization:
- Weekly, Yearly, and All-Time Limits: While not commonly used, these options allow setting message quotas for specific weekly periods, a whole year, or even a user's total message sending capacity.
If you have 1000 SMPP Clients or other users (SQL users, E-mail users) connected, how do you control the various message queues? For instance, how many messages to send from each queue in turn?
The Ozeki NG SMS Gateway employs a round robin algorithm to ensure equitable distribution of message sending capacity among users with credit limits. This method promotes efficient and fair message processing.
Round Robin in Action:
- Sequential Processing: The system operates in a series of rounds, sequentially processing messages for each user with a credit limit.
- Single Message Transmission: During each round, precisely one message is extracted and transmitted from the outbox of each user, provided they possess available credit and haven't surpassed their allocated quota for the chosen time period (daily or monthly).
- Equal Opportunity: This methodology guarantees that each user has the opportunity to transmit messages irrespective of the current number of messages residing within their outbox.
Does your gateway support clustering over multiple servers and how does it occur?
For scenarios involving a large user base requiring access to SMS services, Ozeki NG offers a robust clustering solution. This architecture utilizes a group of independent computers, each equipped with the Ozeki NG software.
Independent Operation with Load Balancing:
- Individual Connections: Each member of the cluster establishes independent connections to the relevant SMS service providers.
- User Distribution: Client connections are distributed across the cluster members using two primary methods: DNS-based server selection and pre-selecting router.
DNS-based Server Selection:
This method offers a straightforward approach. DNS queries trigger the DNS server to return IP addresses using the round robin algorithm. These IP addresses are selected from a pool assigned specifically to the cluster, ensuring even distribution of client connections.Pre-selecting Router with Network Address Translation (NAT):
This method leverages network address translation (NAT) within a pre-selecting router to distribute the load across cluster servers. This approach provides more granular control over traffic management.
Benefits of Clustering:
- Scalability: Clustering enables the system to handle a significantly larger user base compared to a standalone Ozeki NG installation.
- Enhanced Performance: By distributing processing tasks across multiple servers, clustering improves overall system performance and responsiveness.
- Redundancy: In the event of a hardware failure within one cluster member, the remaining servers can continue operations, minimizing downtime and ensuring service continuity.
I cannot send more then 6 messages per second, although I have a 10 MPS license. What can be the problem?
If you're noticing delays in sending messages through Ozeki NG SMS Gateway, don't
worry! There are several potential causes that can be easily identified and
addressed. Let's break down the possible culprits and how to troubleshoot them:
First, check your outbox size. A consistently full outbox (between 100-2000
messages) indicates your system is delivering messages at a healthy rate. However,
a persistently low outbox size (0-100 messages) suggests the system isn't
receiving enough messages to send. On the other hand, a significantly larger
outbox queue means your message source might be overloading the system.
It's also important to consider other queues within Ozeki NG. A large number of
messages (over 100,000) lingering in queues like "sent items" can impact
performance. To optimize performance, you can configure the software to
automatically remove old messages using the "Edit/Server Preferences" form.
While less likely, software limitations can also be a factor. A 10 MPS license
should typically handle sending 10 messages per second. However, a high volume
of incoming messages, such as delivery reports requested for outgoing messages,
can double message traffic and potentially slow down sending.
The internet connection itself can also be a bottleneck. Limited upload speed can
significantly hinder message sending. Aim for an upload speed exceeding 256 Kbps
and minimize bandwidth-intensive applications like video streaming or file sharing
on the same network.
Don't forget about your hardware! If you're using a powerful computer, utilize
the Windows Task Manager to identify processes consuming excessive CPU resources.
Disk defragmentation, screen savers, antivirus software, and automatic updates
can all temporarily impact performance.
The final possibility is that your SMS service provider's system might be slower
than yours. You can check the SMPP service provider configuration form and adjust
the "Window Size" value in consultation with your provider. A lower window size
limits the number of messages sent before receiving confirmation, potentially
slowing down sending performance.
By systematically addressing these potential bottlenecks, you can optimize your Ozeki NG SMS Gateway configuration and achieve the smooth message delivery rates you expect.
What is the scalability schema of the software?
The performance of your Ozeki NG SMS Gateway hinges on the underlying hardware. To ensure it can handle your message volume effectively, the best approach to scaling depends on how you use the software.
There are two main scenarios to consider:
- Few Users, High Traffic: If a relatively small number of users generate a large volume of messages, consider upgrading your hardware to a more powerful machine. Here, prioritize multi-core processors and ample memory (several GBs). Ozeki NG utilizes multiple threads to manage connections with your service provider, so having multiple cores allows it to leverage parallel processing. Additionally, a larger memory capacity allows data caching, further enhancing performance.
- Many Users, Low Traffic: If you have a large user base but each user generates a low volume of messages, adding more PCs to the system can be more effective. This is called horizontal scaling and distributes the processing load across multiple machines, improving overall performance.
Regardless of your scenario, optimizing your hardware plays a crucial role:
- CPU: Prioritize multi-core processors as they can handle the demands of parallel processing more efficiently.
- Memory: Adequate memory (several GBs) is crucial for data caching, which significantly improves performance.
- Network: Network speed has less impact on IP SMS connections compared to CPU and memory. However, it's still important to have a reliable internet connection.
- Storage: While not the primary concern, using fast SCSI hard disks can further optimize performance. However, careful configuration can minimize disk access impact.
By understanding your usage pattern and implementing these hardware and scalability recommendations, you can effectively optimize your Ozeki NG SMS Gateway for smooth and efficient message delivery.
More information
