
 Sign in
 Addressbook
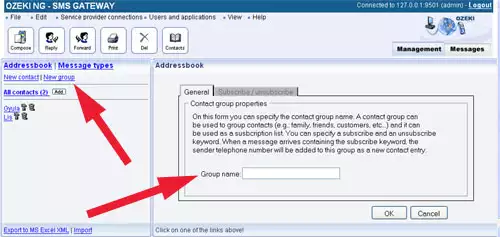
We introduce you the usage of addressbook in according to the following figures. This figure displays for us how to use the addressbook.
Clicking on the Contacts button the Addressbook appears in the NG user interface. You can create a new group, a new contact person. Of course these data can be deleted, or edit by helping of the buttons.
This figure shows us, how to send messages from the addressbook. You have a choice to send the same messages those people, who have been generated under the same group (eg.: Friends group) by clicking of Friends group. (Figure 1 ).


Service with address book
You can create an easy way subscription list to the groups automatically. (Figure 5).

Step 2 Click on the edit button of the group in the group list.
Step 3 Click on the Subscribe/Unsubscribe tab.
Step 4 Check the check box.
Step 5 Specify the subscription keyword, welcome message, the keyword to unsubscribe and leaving message.
Step 6 Save the form.
More information