SMS modem installation (Multitech)
The MultiTech MultiModem Quad band EDGE modem w/USB MTCBA-E-U is an excellent choice for SMS messaging. It works well with Ozeki NG 10 and Ozeki 10. This is a high speed, professional wireless cellular modem. It operates at 230400 baud, 8N1, which is one of the highest speeds we have found in USB modems. It is very reliable. It does not require an external power supply; it powers itself over the USB port.
What is a GSM modem?
A GSM modem is a hardware device that can provide you connection to a service provider. It requires a SIM card to work. It is mostly used to send out automated or bulk messages.
How sending SMS through a GSM modem works
This SMS sending solution makes sending SMS messages from your computer possible. This solution consists of a computer with the Ozeki SMS Gateway installed, a MultiTech modem and the recipient's mobile phone. The computer with the Ozeki SMS Gateway application is responsible for compiling the message. It needs an address and a text body. It will submit the SMS message for sending through the MultiTech SMS modem which will communicate with a service provider. The service provider will deliver the message to the address phone number as an SMS message. (Figure 1)

How to send SMS with a GSM modem
To send SMS with a GSM modem:
- Insert the SIM card into the gsm modem
- Plug the antenna into the modem
- Connect the modem to your PC with USB cable
- Launch the Ozeki SMS Gateway
- Run the sms modem autodetection
- Specify the sms phone number
- Write the text of the SMS message
- Click on Send to send the SMS
- Review the test SMS message you sent
MultiTech MultiModem SMS setup (video tutorial)
In this video you will learn how you can set up a MultiTech MultiModem to send text messages (SMS) using a USB cable. For this setup you need the modem itself, a SIM card, an antenna and a USB cable. First, we insert the SIM card into the modem, then we connect the antenna to the modem as well. Now we can connect the modem with the USB cable to the computer. Once the modem is successfully connected to the PC, the power led will light up to indicate that it is working.
Ozeki SMS modem configuration (video tutorial)
This video tutorial shows you how you can install and configure an sms modem connection in Ozeki SMS Gateway. In this video we use a MultiTech MultiModem, which is automatically detected as the port by the Autodetect system. After it has been detected, we can turn the connection on and send a text message. We type in our message and phone number, then click on Send. We can see that the message was successfully sent and shows up on the mobile device.
Drivers for Windows 10
| Data Sheet | Pages | Size (kB) |
|---|---|---|
| Multitech SMS Modem Driver for Windows 10 (zip) | 64bit | 1464 Kb |
| Multitech SMS Modem Driver for Windows Server 2008 (zip) | 64bit | 1464 Kb |
MultiTech SMS modem documents
| Data Sheet | Pages | Size (kB) |
|---|---|---|
| MultiModem Quad band EDGE SMS modem w/USB User Gude (PDF) | 29 | 960 |
| MTCBA-E-U MultiModem Quad band EDGE SMS modem w/USB Data Sheet (PDF) | 4 | 922 |
| MTCBA SMS Modem User Manual (PDF) | 42 | 923 |
| MTCBA SMS Modem AT Commands (PDF) | 287 | 1426 |
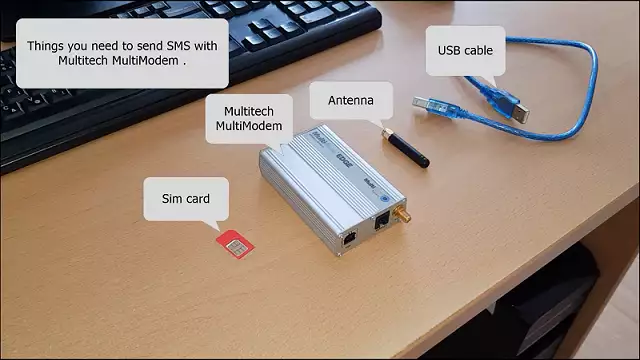
Get the parts that you need to connect the modem successfully
To connect the modem successfully, you need a SIM card, an antenna, a USB cable
and the modem itself to set up your Multitech SMS modem to your PC. (All shown in Figure 2)
Make sure that you have all the hardware you need to use the modem, because every little detail is important.
Insert the SIM card into the modem
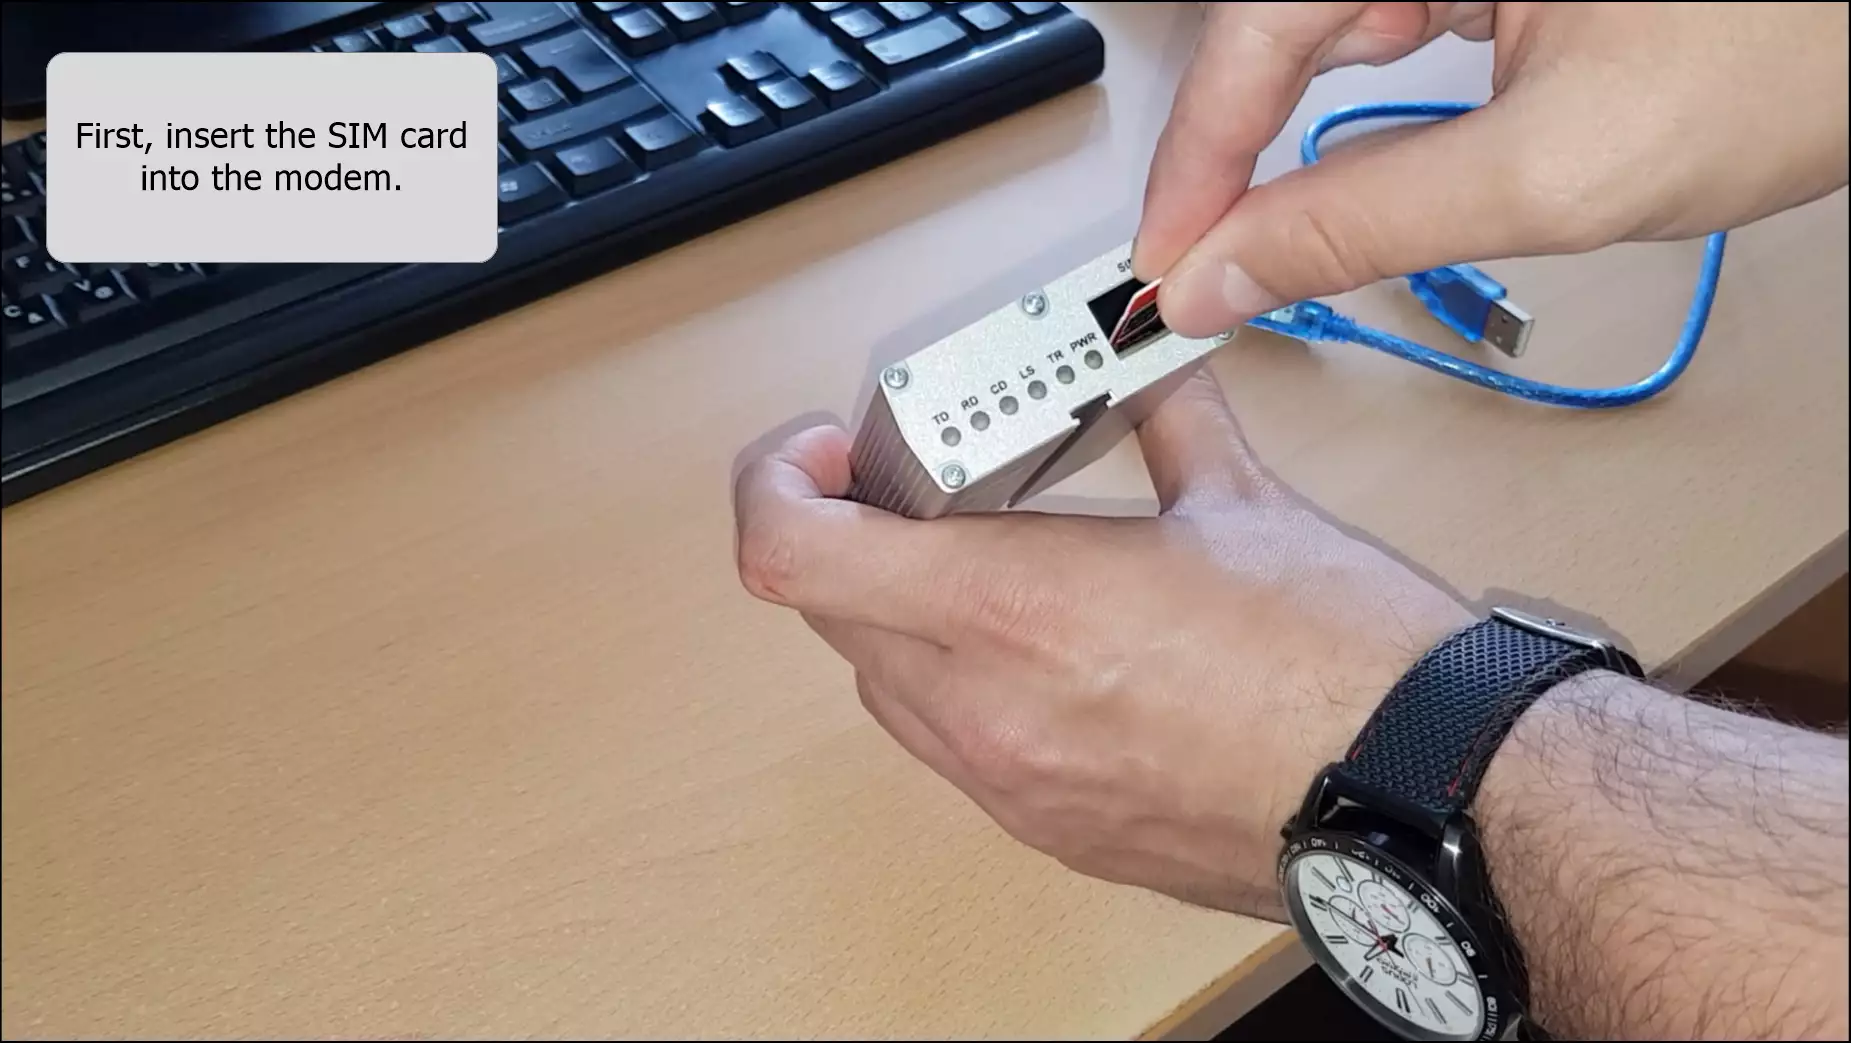
The first step that you have to perform is to plug the SIM card into the
modem. This procedure is similar to inserting a SIM card to a mobile phone. The SIM card makes the connection
between the modem and the network.
(Demonstrated in Figure 3)
Connect the antenna to the modem
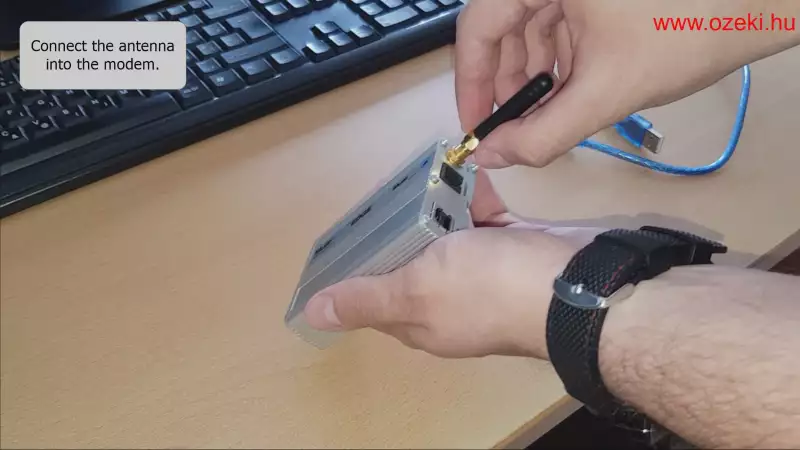
After inserting the SIM card, you have to connect the modem to its antenna. Make sure that it is connected correctly in order to get best performance. The function of the antenna is to transmit and receive signals. (Shown in Figure 4)
Insert the USB cable into the modem
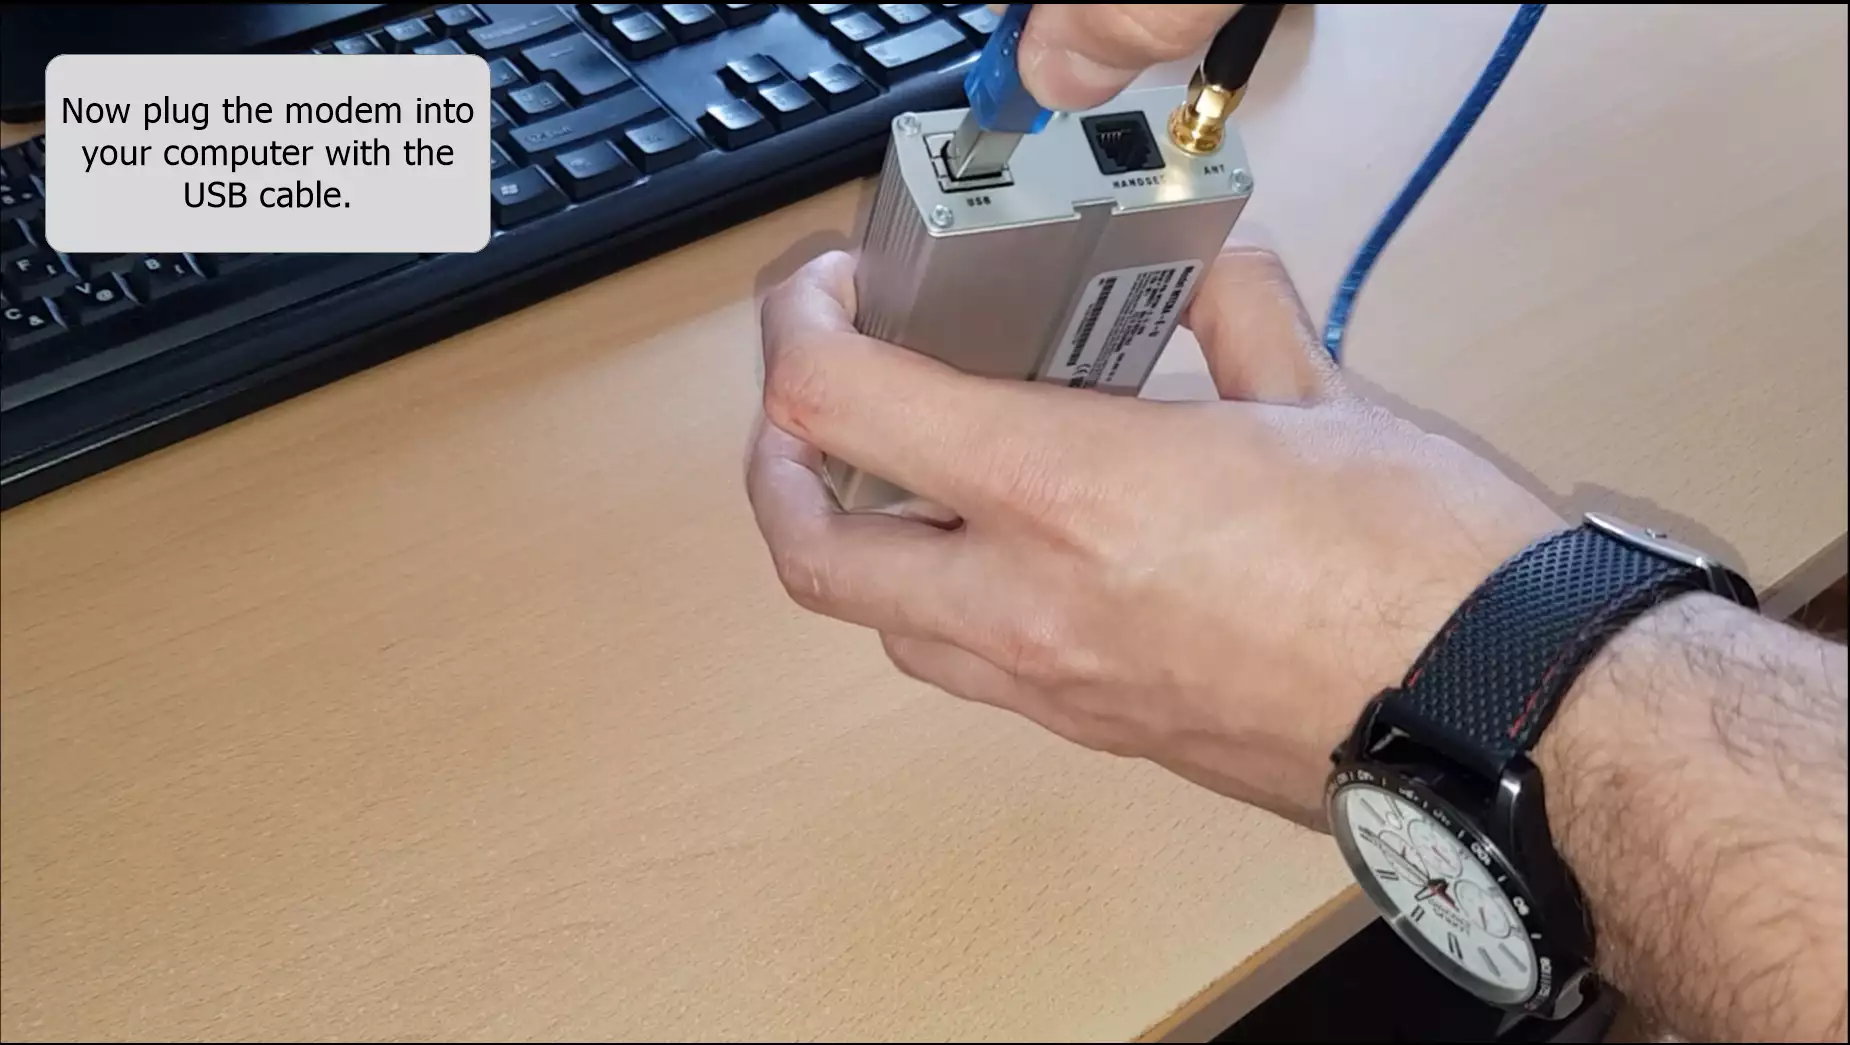
The next step is to insert the USB cable into the modem. This will connect the modem to your computer, so it is advised to use a perfectly working cable to avoid disconnections. (Figure 5)
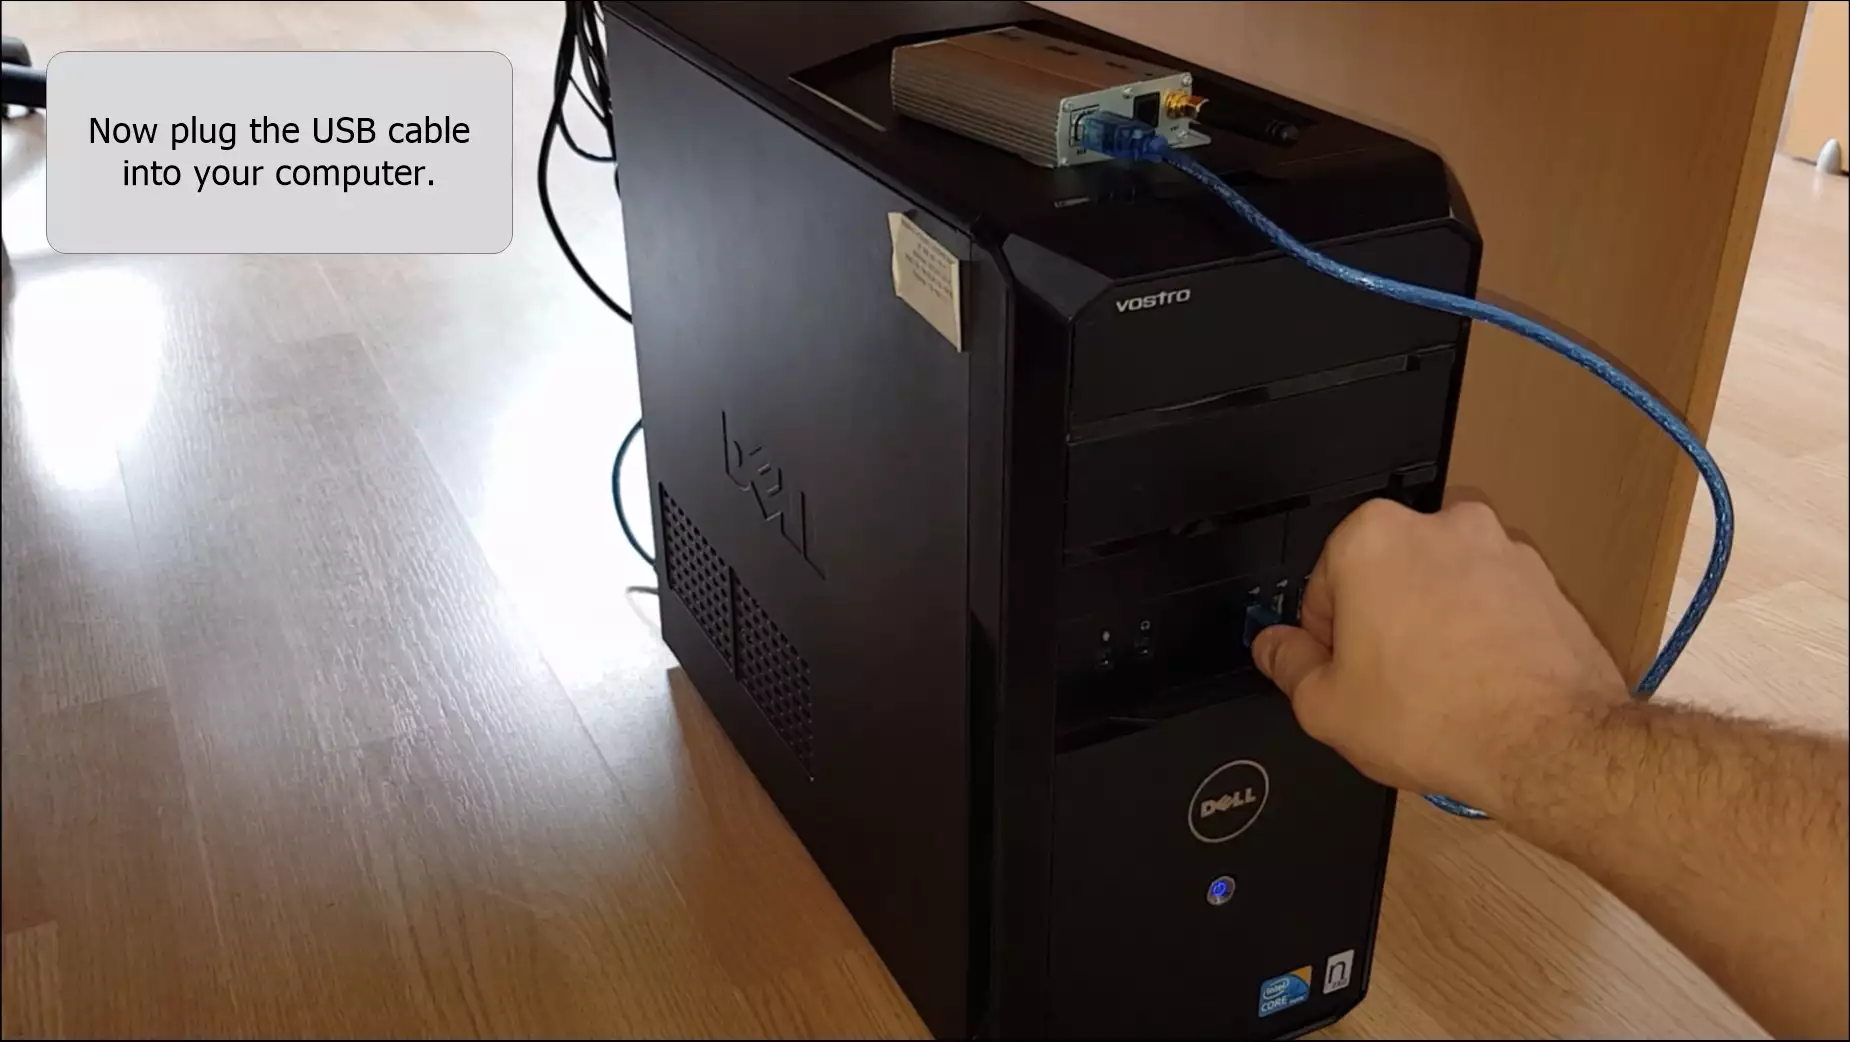
Plug the USB cable into your computer
Lastly, the other end of the USB cable has to be connected to your PC. Plug it into the computer (As you can see on Figure 6)
Check the power led
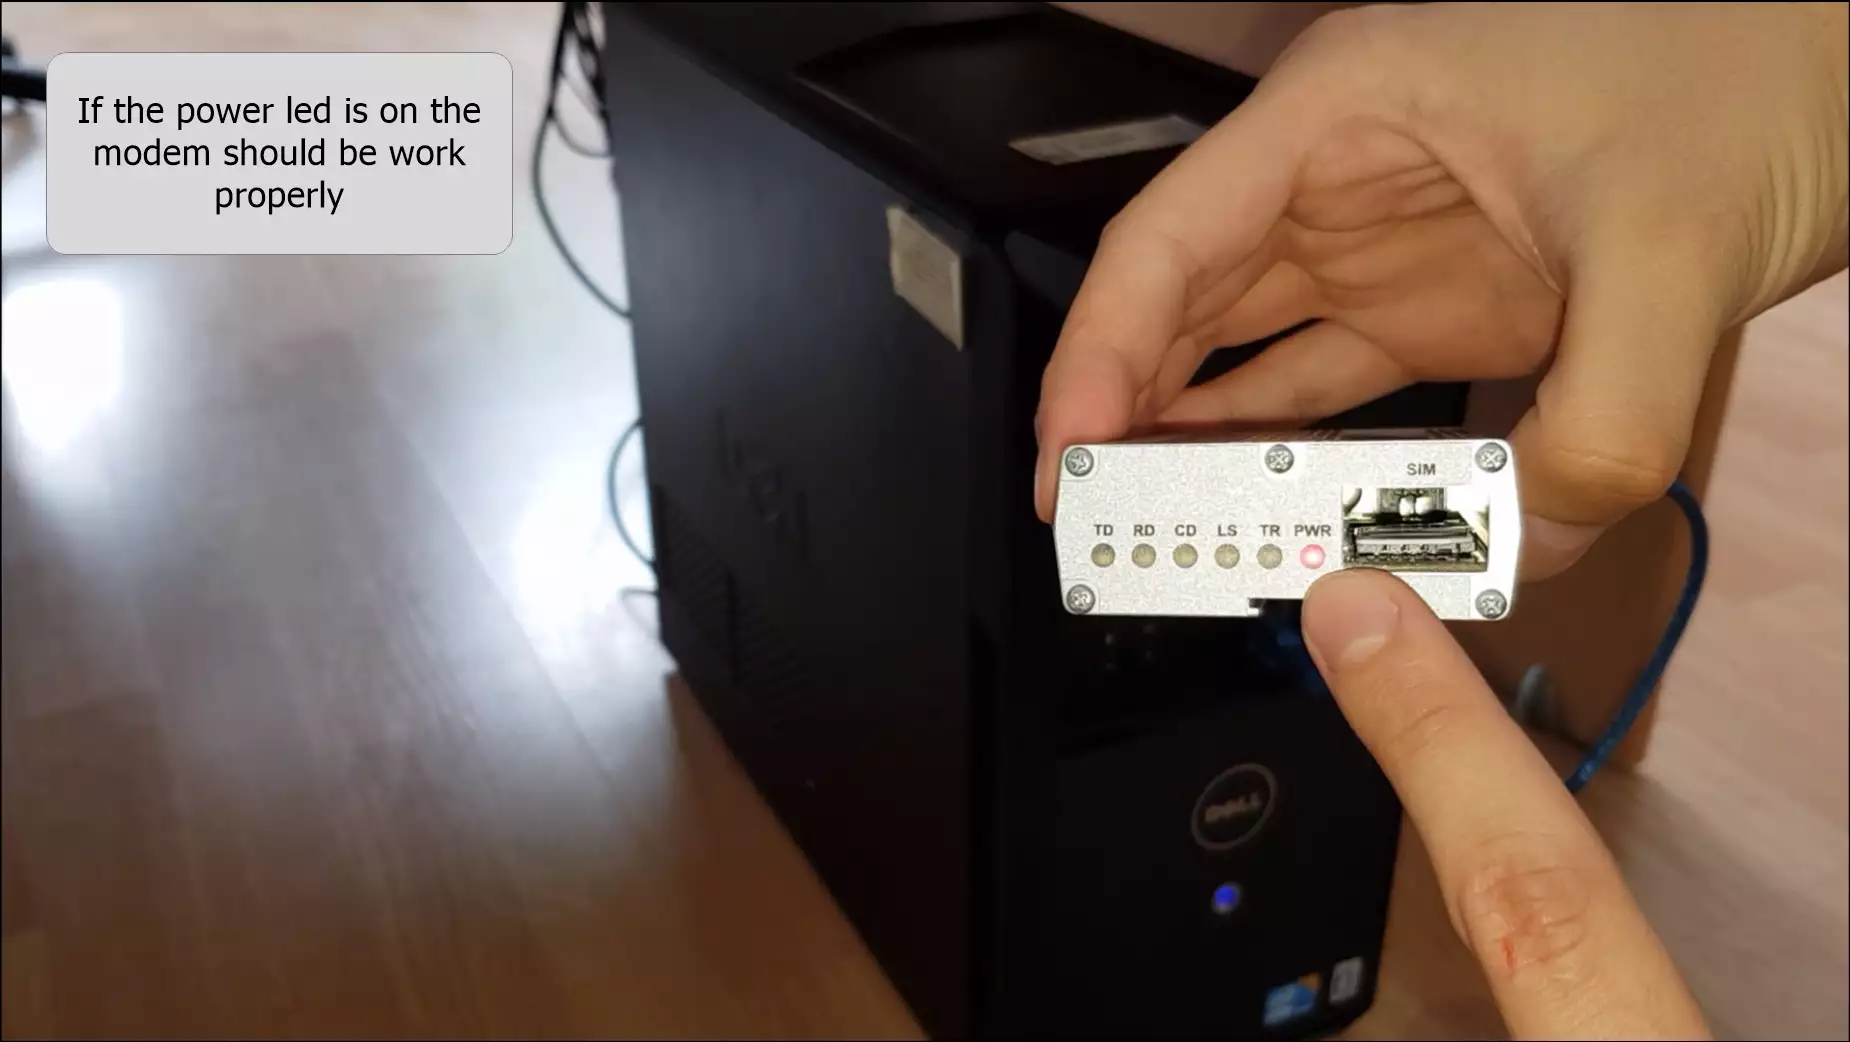
If you have done everything right until this point the power led on the modem should be on. (Shown in Figure 7) In order to control the modem with AT commands (at+cmgs) in Text mode or PDU mode, it is necessary to assemble the GSM modem in the same way.
Open Ozeki SMS Gateway
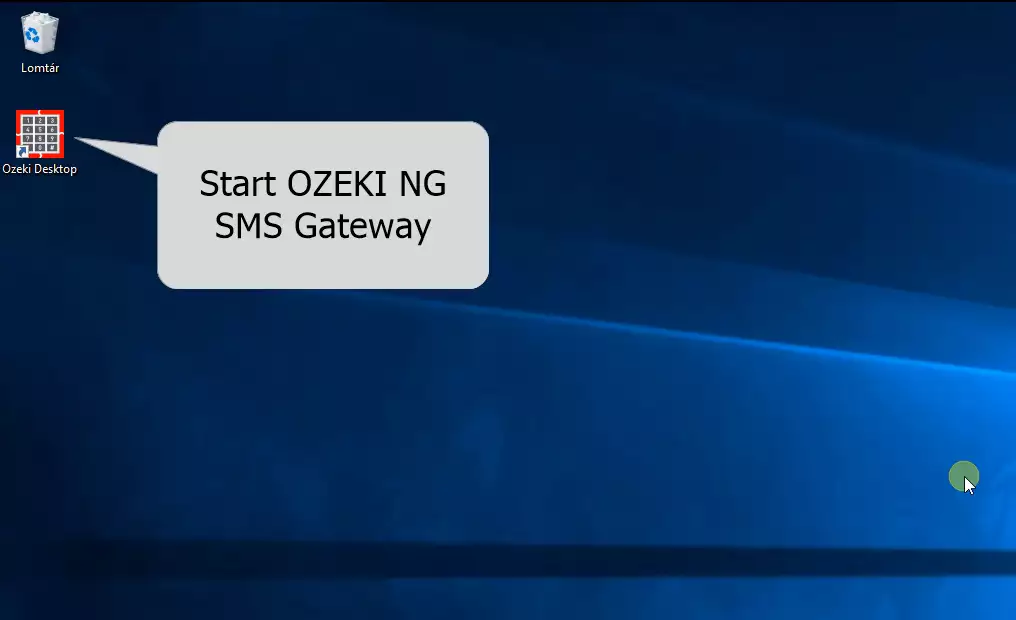
Now your modem is ready to be configured. The first step you have to fulfil is to open Ozeki 10 SMS Gateway on your desktop. To open the program, click on the Ozeki Desktop shortcut twice. (Figure 8)
Log in with your Ozeki 10 SMS Gateway account
Next, log in with your Ozeki 10 SMS Gateway account by typing in your username and password. This account has to be created during the installation process. Only created accounts can be used during this process. (Shown in Figure 9)

Add new connection in the SMS Gateway
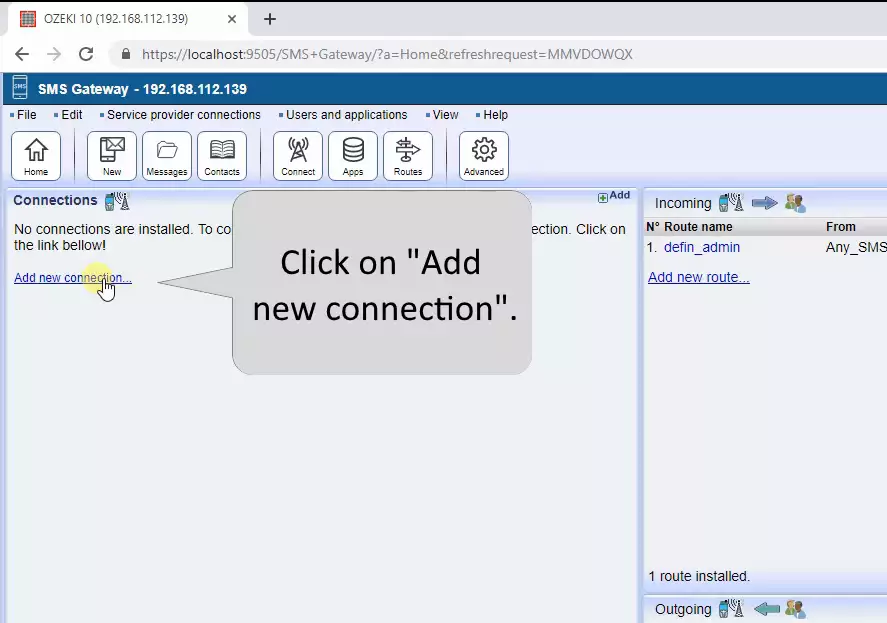
In the SMS Gateway application, the first thing that you need to do is to create a new connection. This can be done in the Connections panel where you have to click on the Add new connection... link. (As you can see on Figure 10)
Select the SMS modem connection to install
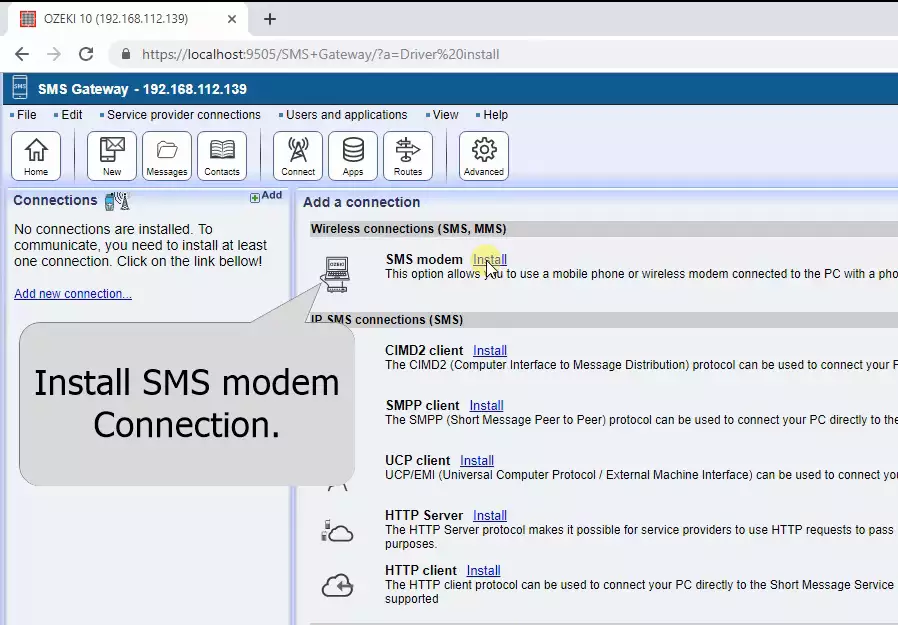
The next window lists you all the connections that you can create in the SMS Gateway application. Now you have to look for the Wireless connections install list and select the SMS modem install item by clicking on the Install link. This will allow you to use the modem in the Ozeki SMS Gateway. (Demonstrated in Figure 11)
Autodetect the port where you connected the modem
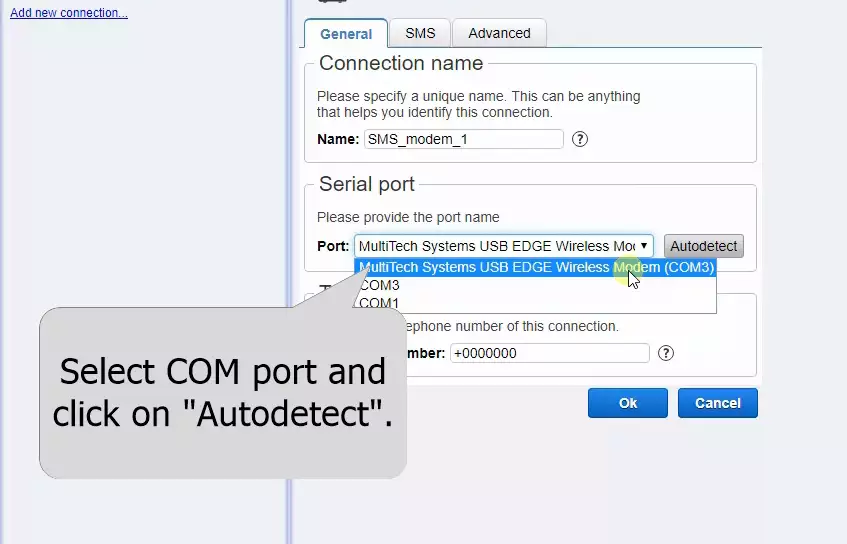
In the installation menu, on the General tab, you can find the Serial Port group box. In the Port combo box, you need to select the port where you connected the modem. For autodetection, just click on the Autodetect button. The Autodetect button will recognize your device if it is connected properly. (Figure 12)
Check the information
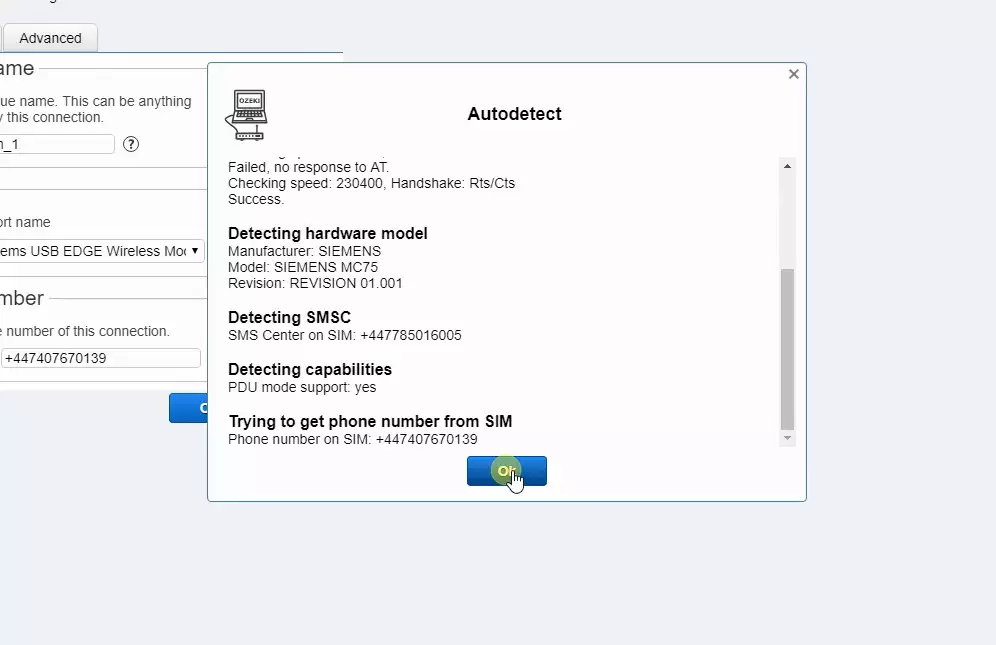
This Autodetect option will detect your modem, and if it is connected right, the following window should show up with information about your connected modem and SIM card. You can check in this window that every detail is right with the hardware and the SIM card, just to make sure that you are using the proper hardware. Click the Ok button if you finished reading. (Figure 13)
Send an SMS message using the modem connection
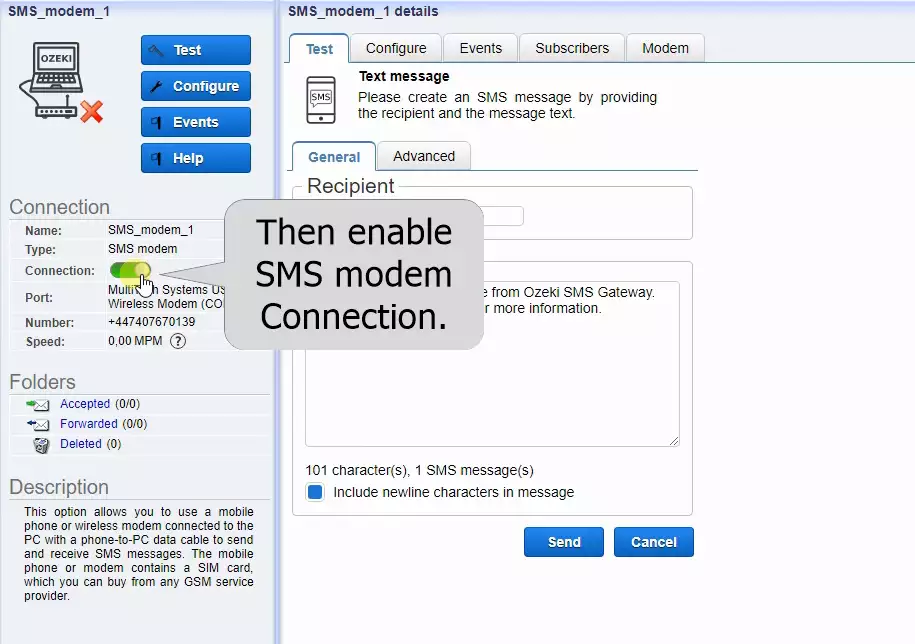
At this point, you have an SMS modem connection in the SMS Gateway application. To handle SMS messages with this connection, first, you need to enable the connection (Figure 14) by turning on the switch button in the connection details window. The green colour shows that you enabled SMS modem connection. Important to note that you can't ignore this step because it is required to have an enabled connection to send SMS.
Give the recipient's address
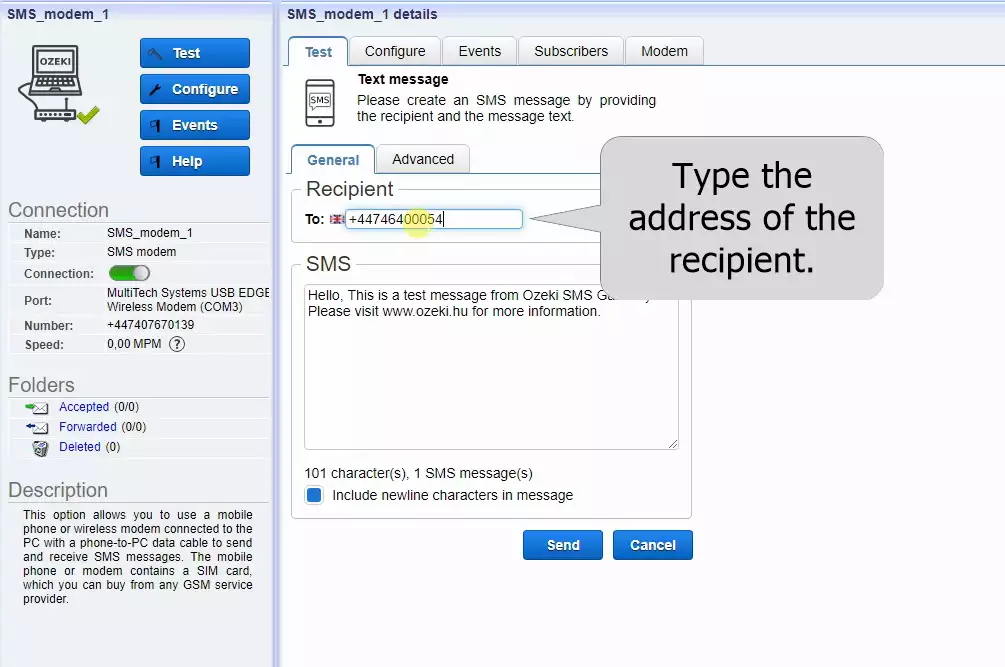
After you enable the connection, go to the Test tab page. It has a General tab; select it and you will find the Recipient and SMS group boxes. To send the SMS, you need to type the phone number of the recipient into the To: text box. (Figure 15)
Type in the test message
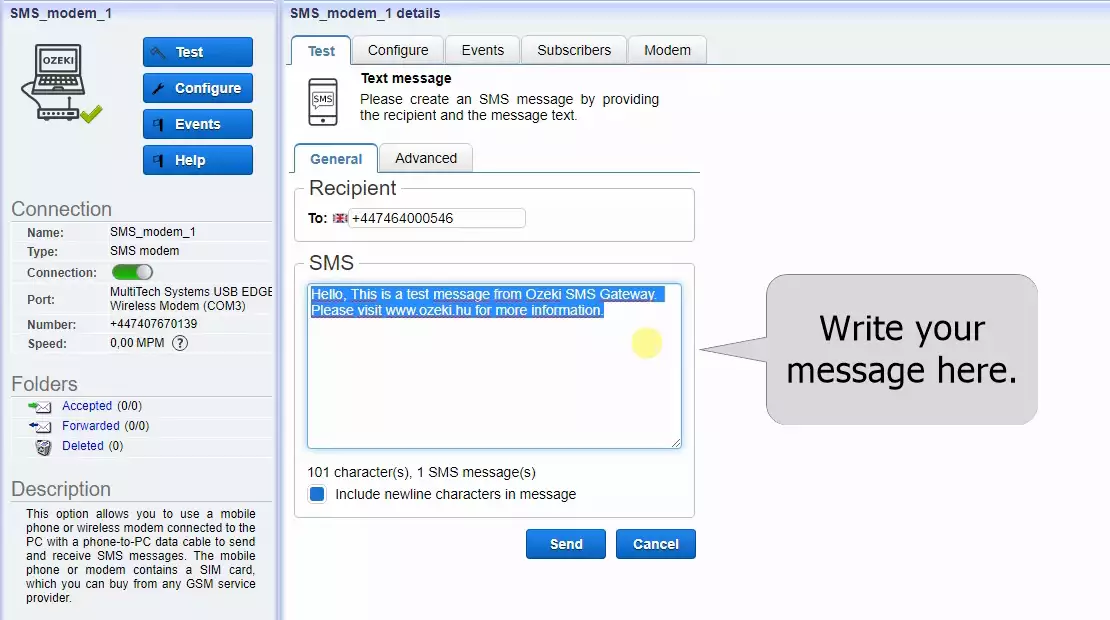
Next, just type the test message to the SMS group box. This message will be sent as an SMS to the previously given address. You can write whatever you want. (Shown in Figure 16)
Send the SMS
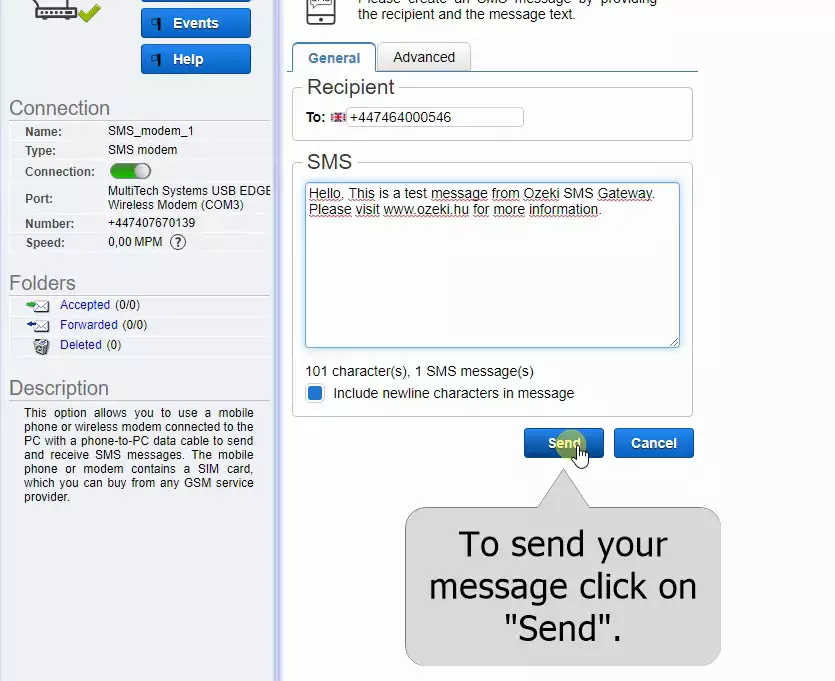
If you are ready to send the SMS message, just click on the Send button (Figure 17).
Check the test message
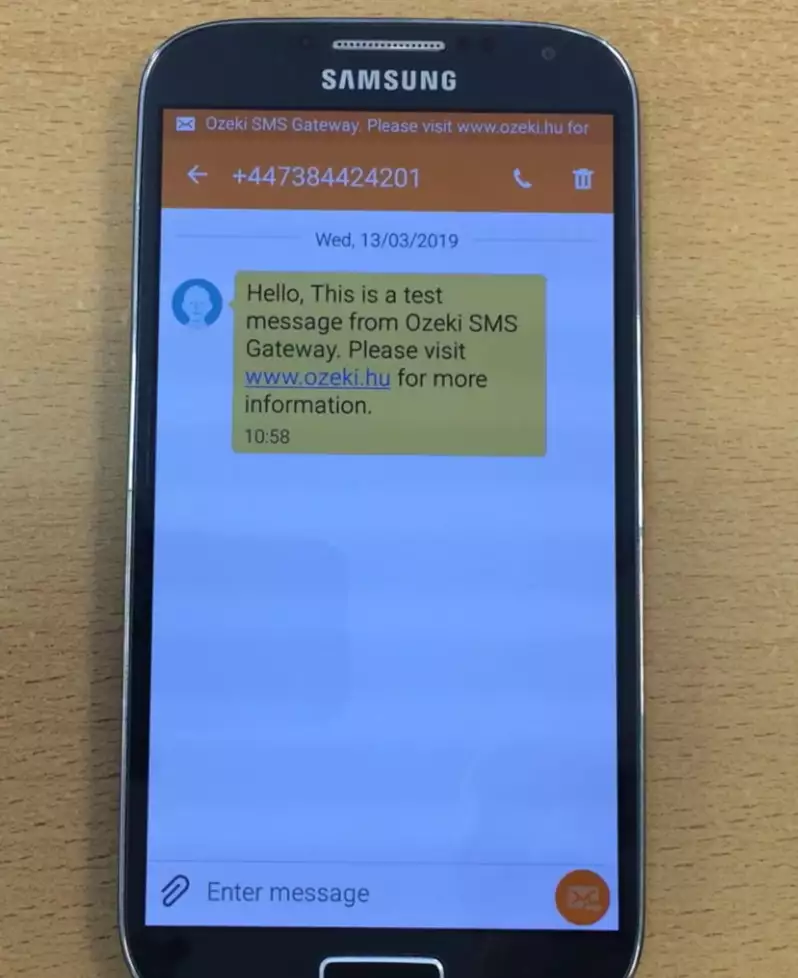
If you did everything in the right way, the message will be received by the recipient, as you can see in the test phone. This message is a simple SMS, just like the ones that you would get from other people. This shows you that you are ready to use the Ozeki SMS Gateway and the MultiTech MultiModem for your purposes. (Figure 18)
Quick Data sheet
| General | |
| Form Factor | External |
| Manufacturer | Multi-Tech Systems Inc. |
| Interface Type | USB |
| Connectivity Technology | wireless |
| Max Transfer Rate | 240 Kbps |
| Fax Compatibility | G3 |
| Cellular Protocol | EDGE, GPRS, GSM |
| Antenna | External detachable |
| Antenna Qty | 1 |
| Package Type | OEM |
| Connector Type | RJ-9 |
| Min Operating Temperature | -30°C |
| Max Operating Temperature | +65°C |
| Brand | Multi-Tech |
| Product-Line | Multi-Tech MultiModem EDGE |
| Model | MTCBA-E-U |
| Packaged Quantity | 1 |
| Compatibility | PC |
Summary
As you can see in the guide, the MultiTech MultiModem works really well with Ozeki SMS Gateway. Using them together lets you send messages from your computer, helping your company to grow bigger. You can use this to send out automated or bulk messages. After you went through the steps, got the needed hardware and software, you will be able to send SMS using your computer.
You can download the Ozeki SMS products and you can read about SMS hardware.
Now it is time to get Ozeki 10 and a MultiTech MultiModem to your company and start working with them!
