Installation Steps
In this guide you can learn how to install Ozeki NG - SMS Gateway software. You will be instructed what to do in each dialogue box of the Ozeki NG - SMS Gateway Setup Wizard to successfully finish the installation.
Step 1 - Downloading Ozeki NG SMS Gateway
The latest release of Ozeki SMS Gateway can be downloaded from the Ozeki 10 SMS Gateway download page. To download the installer in compressed format, you need to click on the first OzekiNG-SMS-Gateway_x.x.xx.zip link as Figure 1 shows below. We recommend you to always download the latest version. This version always contains all the currently available features and improvements.

Step 2 - Open the downloaded file
When the download finished, you have to open the compressed file to be able to run the installer of the software. For that, please click on the downloaded file as you can see it on Figure 2 in your browser or open the Downloads folder on your computer.

Step 3 - Run the installer
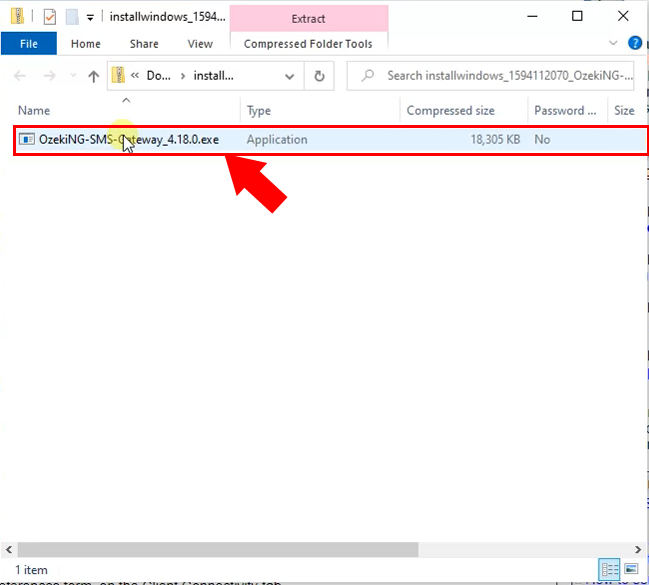
After you extracted the .zip file, just click on the executable file to start the installation process just like in Figure 3.
Step 4 - Install Ozeki NG SMS Gateway
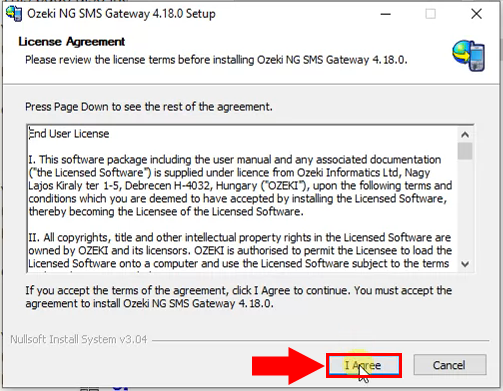
As soon as you clicked on the .exe file, the installer starts with a License Agreement screen (Figure 4). Please review them then, click 'I Agree' button to continue.
Step 5 - Set installation location
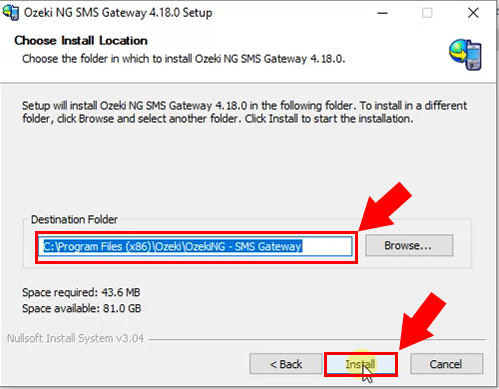
On the next page define the destination folder of the Ozeki NG SMS Gateway. Click install to start the installation (Figure 5).
Step 6 - Set admin password
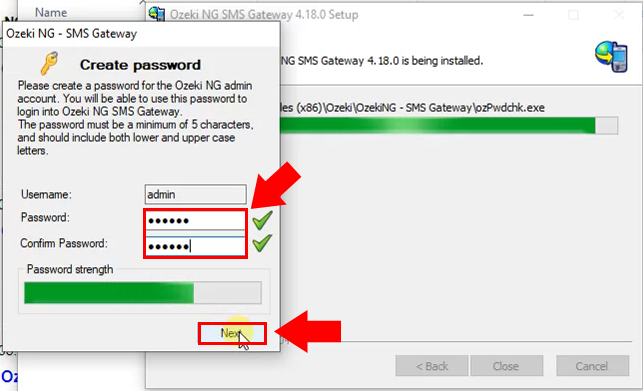
During the installation you need to define the password for the admin user. You will be able to use this password to login into Ozeki NG SMS Gateway (Figure 6).
Step 7 - Login to the GUI
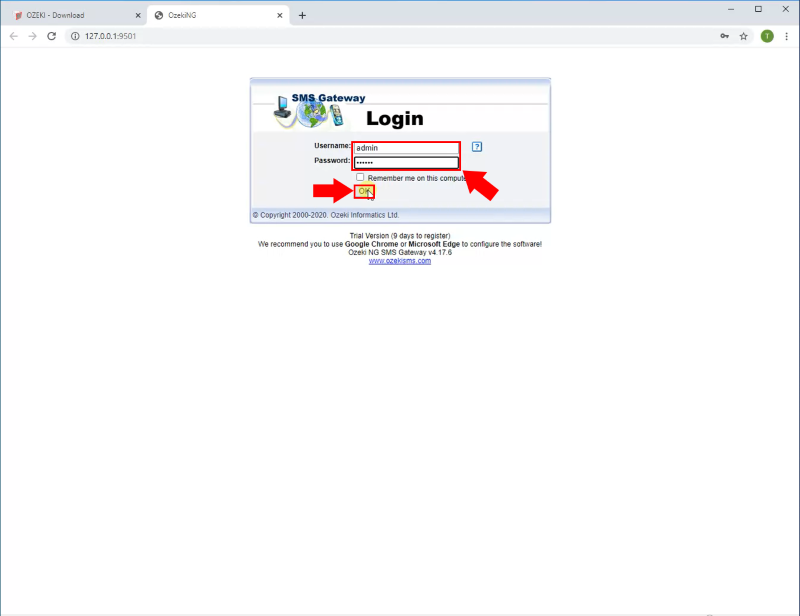
After the installation finishes, both the Installation Complete dialog box and the login window will show up. Enter the username and the newly created password and click on the OK button to login (Figure 7).
Step 8 - Ozeki NG SMS Gateway home page
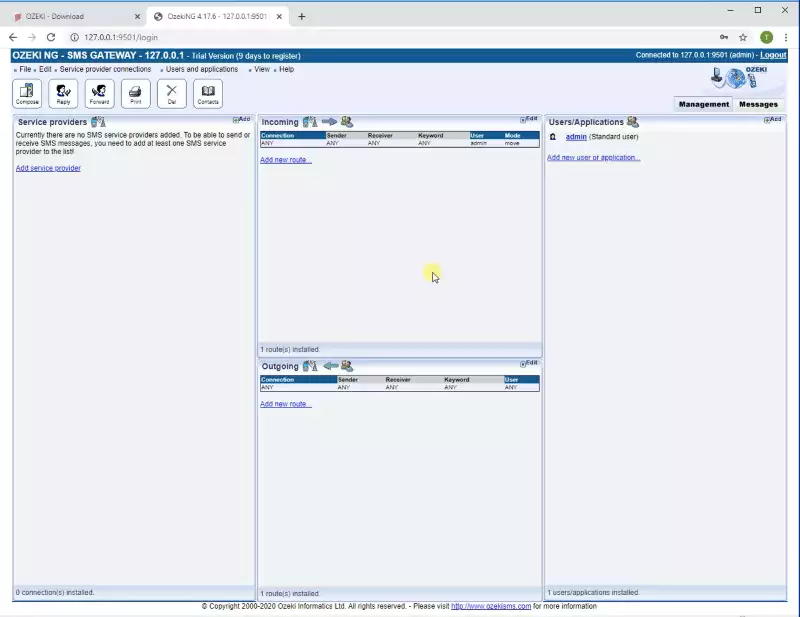
Finally, the home page of the Ozeki NG SMS Gateway will appear (Figure 8).
