Quick Start Guide
This guide provides you with detailed information about how to setup your Ozeki Android SMS Gateway quickly. In order to send and receive text messages, you need an Android SMS Gateway application on your Android Mobile Phone and an Ozeki NG SMS Gateway installed on a Windows PC. The Android SMS Gateway app converts your android mobile phone into an SMS Gateway to send and receive text messages. The SMS gateway app works as a GSM SMS modem. You can connect to other Ozeki softwares.

Step 1. - Install Android SMS Gateway apk on your smartphone
Download, install and configure the application

Option 2: Visit Ozeki website: Download from https://android-sms-gateway.com the .apk and install it manually on your Android mobile phone
Start the application by clicking on its icon then "Start" button. You will see the followings on the top left-hand side of the screen: Host address, Port number, Username, Password (Figure 2). You need these parameters later.
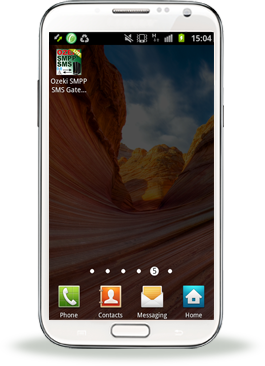
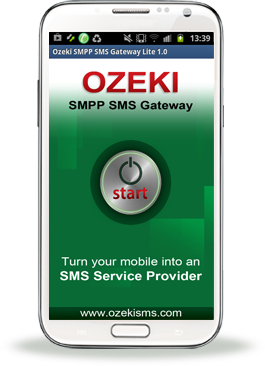
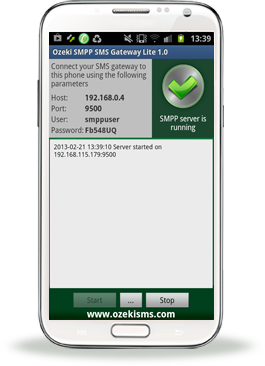
Figure 2 - Ozeki Android SMS Gateway has been installed
and launched successfully
Step 2. - Install Ozeki NG SMS Gateway on your Windows PC
How to install Ozeki NG SMS Gateway
You can download Ozeki NG SMS Gateway directly from Ozeki. After you have downloaded the software, you need to install it. First, open Ozeki NG SMS Gateway installation file, then run the setup.exe file (Figure 3).
You can find a detailed step-by-step installation guide for Ozeki NG SMS Gateway on the following page: How to install Ozeki NG SMS Gateway
Login
You can login to the user interface (the management console) by entering your username and password (Figure 3). If you need assistance for login, please take a look at Ozeki NG SMS Gateway Quick Start Guide. For an overview about how to use it, check out the User Guide.
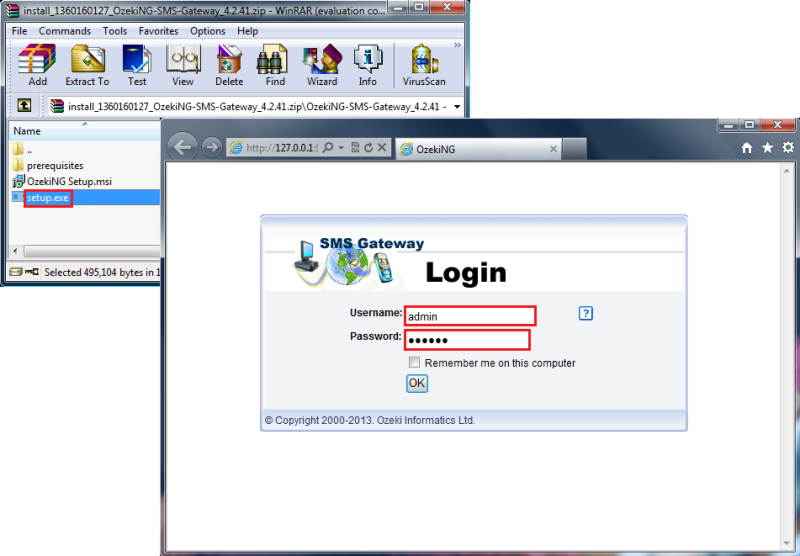
Figure 3 - Logging after installation
Step 3. - Setup Ozeki NG to use your Android phone
Configuration in Ozeki NG SMS Gateway
Now you need to install and configure SMPP (Short Message Peer-to-Peer) connection. Firstly, add new service provider connection by selecting and clicking on "Add new service provider connection" text link. After this the "Add service provider panel" will appear on the right side of the GUI. Look for "SMPP Connection", then click on "Install" to select the SMPP protocol (Figure 4).

Figure 4 - Adding a new SMPP connection
Now the SMPP Configuration panel appears on the right side of the interface. It contains 7 tabs. You can find a detailed step-by-step installation guide about configuration on the following page: How to setup Ozeki Android SMS Gateway for Ozeki NG SMS Gateway
The main steps in brief:
-
SMPP settings tab:
You need to enter the following parameters: Host number, Port number, Username, Password. You can find this information in your Ozeki Android SMPP SMS Gateway application (see Figure 2).
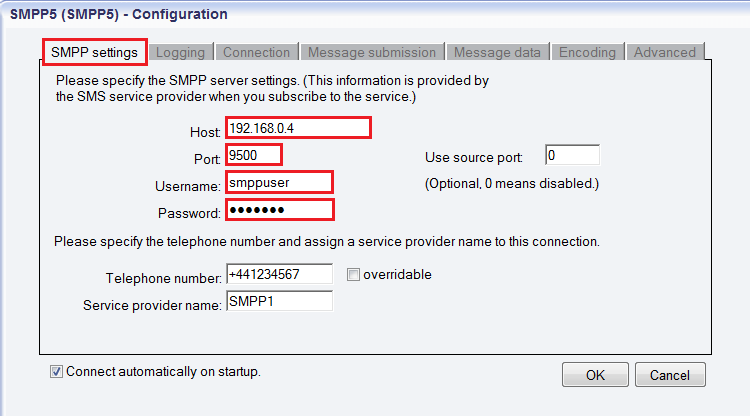
Figure 5 - Specifying the SMPP server settingsIn this tab you can also specify the telephone number used to this connection and the service provider name. I you tick the "overridable" checkbox, you can replace the phone number specified in the Telephone number edit box with a different one to be displayed as the sender of an outgoing message. You can replace the number with text (up to 11 characters) as well. As a result, before you send your message, you can enter any different phone number or a name as the sender ID of the message. Click on "OK" button.
-
Other tabs: Leave the settings on their default values.
In the left side of the screen click on Events. The "Successful login" and "Connection online" messages in the Events panel indicate that the SMPP connection has been installed successfully (Figure 6).

Figure 6 - SMPP connection has been installed successfully
Step 4. - Send your first SMS
In order to compose and send SMS message, click on the "Compose" button in toolbar in the top left-hand of the screen. After clicking it, you can choose Message type or you can check the Address book in the left side of the screen and in the right part the Compose a text message panel will appear. (Figure 7).
After selecting the appropriate message type (in Figure 7 "Text message"), on the right side of the screen you need to select subtype. Then, enter the recipient phone number in international format (starting with "+") in the To (Address book) edit box. Finally, compose the message in the Message text edit box.
Next to the Message text box there is a character counter, which shows that your SMS message will be sent as one or more messages.
Under the Message text box check the first checkbox, if your message includes newline characters. If you want to send your SMS later, check the "Schedule for later sending", than define the date and time of sending. When you are finished, click on "OK" button.
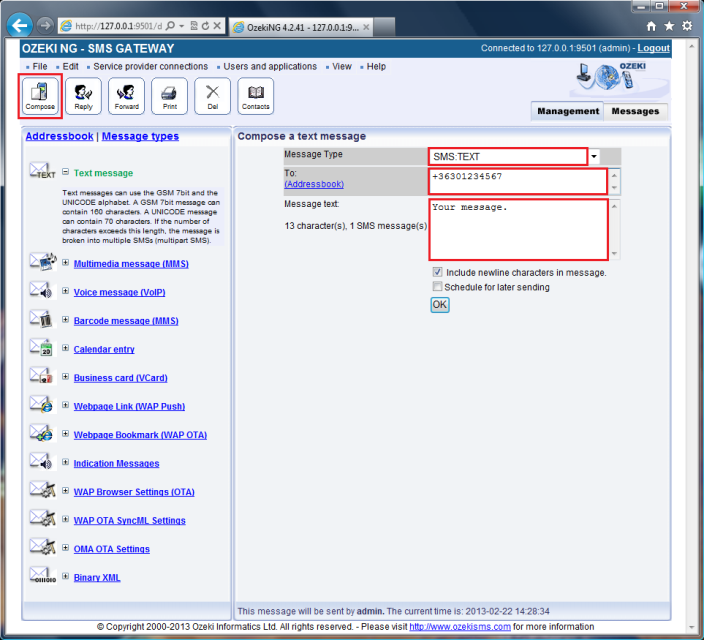
Figure 7 - How to send your first SMS message
Detailed Android SMS Gateway setup instructions
Conclusion
The Quick Start Guide above presented how to setup Ozeki Android SMPP SMS Gateway for Ozeki NG SMS Gateway easily and quickly. If you follow these steps, you will be able to install and configure the application and to create connection between the GSM network and the IP network.
If you have any questions or need assistance, please contact us at info@ozekisms.com
Get more information!
People who read this also read...

Find out more about system requirements then download Ozeki Android SMPP SMS Gateway. After installation configure network settings in the application.

To establish SMPP connection downloading and launching Ozeki NG SMS Gateway is required. Enter your username and password to login.

Add a new connection using Ozeki NG SMS Gateway, then configure it. You can find detailed step-by-step guide about the settings required.
|
More information |

|
|
Provide SMS services with Ozeki Android SMPP SMS Gateway. Click here to details. |
 |
Top 10 benefits, which makes Ozeki Android SMPP SMS Gateway so amazing. |
|
|
|
|
|