Send SMS from Ozeki Excel Client II
It is possible to send customized SMS messages generated from XLS or XLSX files to mobile phones. XLS or XLSX files can be easily created with any spreadsheet developer software like Microsoft Excel or Google Sheets or Libre Office. To read the spreadsheets and send SMS messages from them, please download Ozeki Excel Client II.
Download: Ozeki_Excel_Client_II_v1.0.zip
Ozeki Excel Client II is a free tool designed to make bulk SMS sending faster and simpler. It supports international characters which are not part of the GSM 7-bit character set. For example, Persian, Chinese, Arabic, Thai, Cyrillic etc. This article describes how to create spreadsheets and use Ozeki Excel Client II with them.
The basics
Ozeki SMS Gateway is available to send or receive bulk SMS messages. Ozeki Excel Client II and Ozeki SMS Gateway are the perfect combination for SMS sending. Ozeki Excel Client II reads the messages from XLS spreadsheets and forwards them to Ozeki SMS Gateway. The client must connect to a user installed on the SMS Gateway. Only the IP address of the gateway is required and the username, password pair for the user.
Create the solution to send SMS from spreadsheets
Ozeki Excel Client II accepts XLS files from any spreadsheet developer. You only have to worry about filling the cells in a given order. In Microsoft Excel this can be done by typing, copying and pasting or dragging cell contents. Download an example XLS spreadsheet to start.
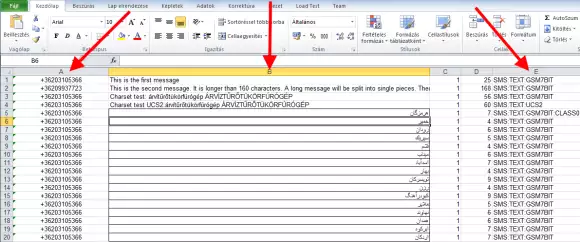
The information related to the same message is held in the same row, but in different cells. Most information is entered or edited manually, while the remaining information is entered or edited automatically. Keep in mind that 'A', 'B' and 'E' columns contain mandatory values (Figure 1)!
- Column 'A': The recipient's phone number. Make sure not to use spaces and start with '+' and the country code.
- Column 'B': The content of the SMS message. If the message is longer than 160 characters, it should be sent in two or more parts. In this case each part should consist of 153 characters. The remaining character space should contain concatenation information. After reaching the recipient's phone, the parts should be combined to a single message.
- Column 'D': Contains a function that calculates the character length of column 'B' e.g. D1: =LEN(B1)
- Column 'E': Contains the type of the SMS message that can be sent.
- Column 'F': It is the place where you put the name of the SMS messaging service provider connection. For more information of setup sms connections please check out service provider connections page.
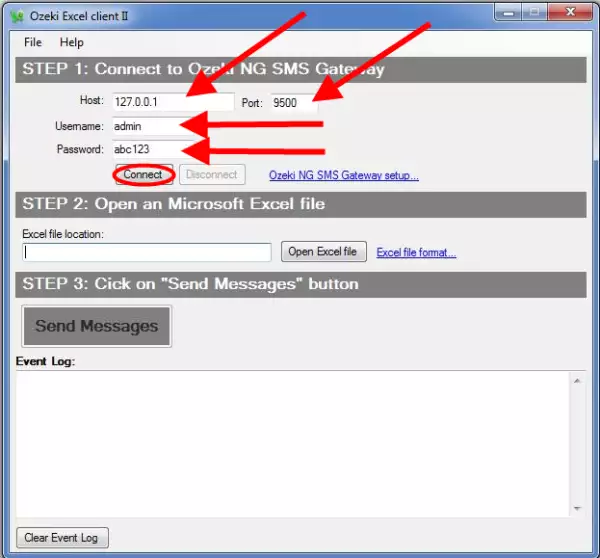
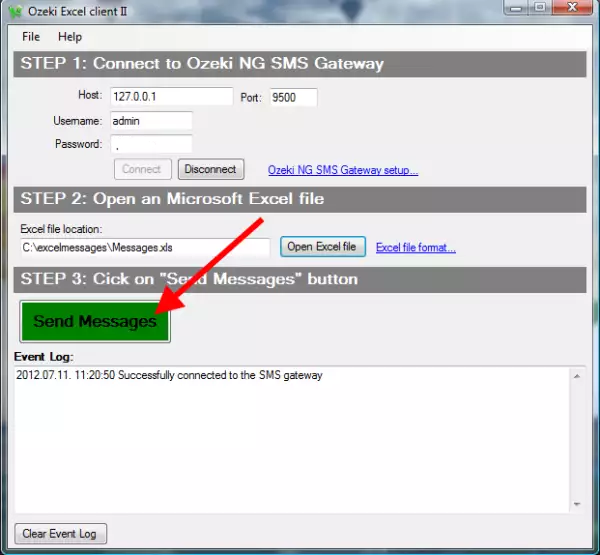
After you have successfully edited the XLS file and added the mandatory values to every row, you should install Ozeki SMS Client II. After opening it enter the connection details to your Ozeki SMS Gateway and click 'Connect' (Figure 2)
In 'STEP 2': Browse your file system for the edited XLS file (Figure 3) and add the file by pressing 'Open' (Figure 4).
Remember that the file should contain the phone numbers of the recipients, the message contents and the message types.
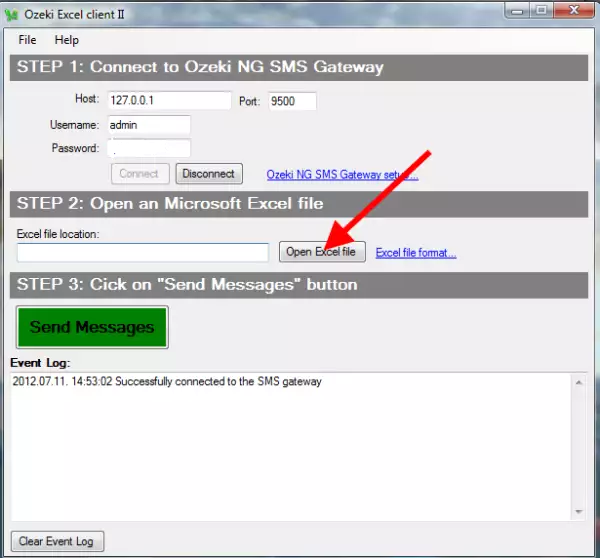
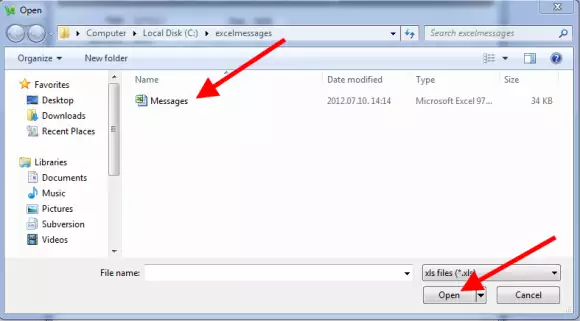
Finally press 'Send Messages' (Figure 5)
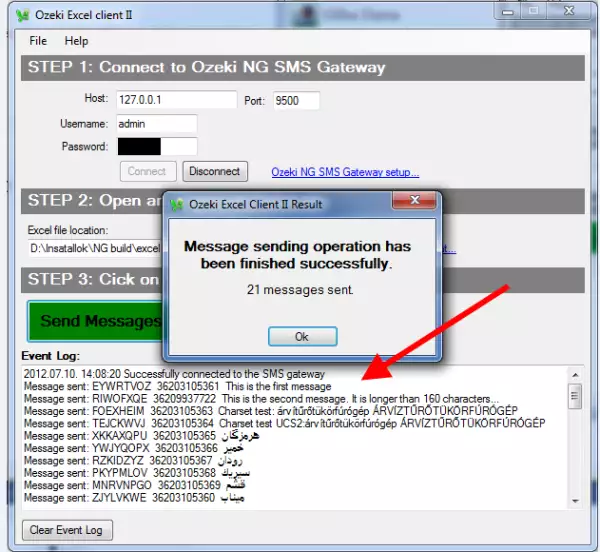
A window pops up if the messages were successfully sent (Figure 6). Check the details in the 'Event Log' field.
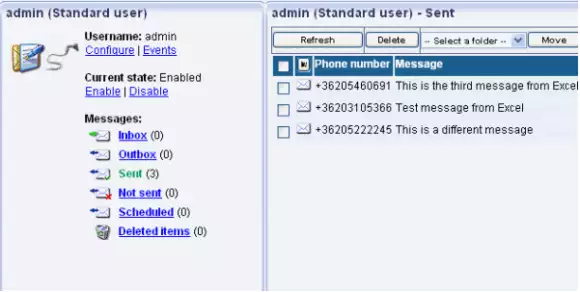
Check if the messages have been successfully sent. Open the browser GUI of Ozeki SMS Gateway. Click on the 'Sent' message folder (Figure 7) of the same user that was used with Ozeki Excel Client II.
