The Toolbar
This page explains how to use the toolbar buttons in the graphical user interface of the Ozeki NG - SMS Gateway software.
The toolbar allows you to manage your SMS messages. Using the buttons you can perform different operations: composing, replying to, forwarding, printing and deleting SMS messages.
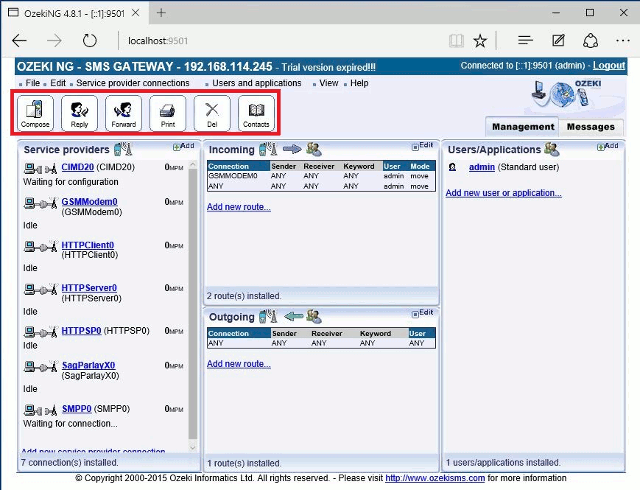
The toolbar can be found in the header of the graphical user interface of the program, immediately below the menu bar (Figure 1).

To compose an SMS message, click the Compose button.
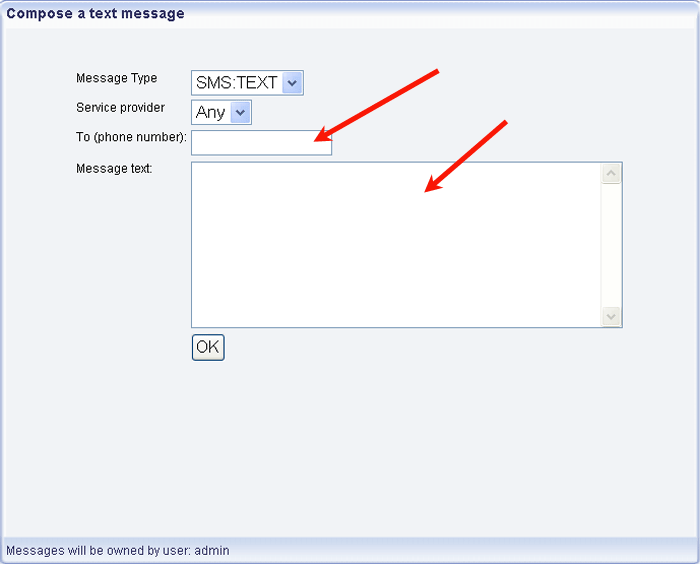
This will open the Compose a text message panel (Figure 2).

In the Message Type dropdown menu you can select the
type of the message you are composing.
In the Service provider dropdown menu you can select the service
provider connection you want to use to send out the message.
The To (phone number) edit box is for the recipient telephone number.
Please note that the phone number
needs to be entered in international format: starting with "+".
The Message text box is for composing the message.
You can also open this panel by clicking the
New message item in the File menu. (For information about the menu,
check out The Menu page.)
The Reply button allows you to reply to an SMS message.
Clicking it will open the same panel you use for composing a new message
(see Figure 2 above).
However, the phone number of the SMS message you are replying to will
automatically show up in the To (phone number) edit box.
The Forward button enables you to forward
an SMS message to any recipient phone number.
Clicking it will open the same panel you use for
composing a new message (see Figure 2 above).
However, the message you have received will automatically show up
in the Message text box.
The Print button allows you to print out the SMS message.
To delete an SMS message, click the Del button.
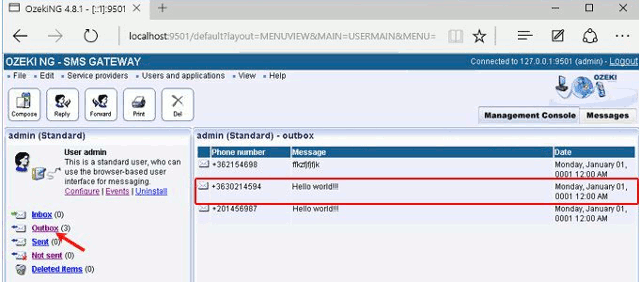
To reply to, forward, print or delete an SMS message, select it
from the list in the panel that shows up when you select one of the folders in
the user account (Figure 3).
After selecting the message, click the respective button
in the toolbar to perform the desired operation.
To open a panel containing a user account, click the name of the user
in the Users and Applications panel in the Management Console.
This user account panel will show up on the left.

For more information about user accounts, check out the Users and Applications page.
