Autoreply Database User installation guide
This guide gives you the steps to install the Autoreply Database User.
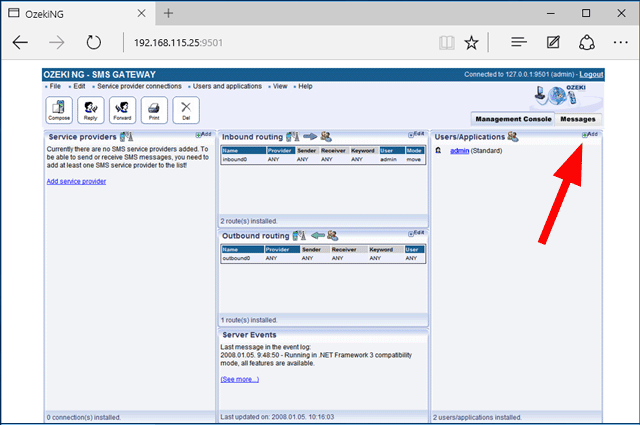
To start installing and configuring an Autoreply Database User, click the Add button in the top right-hand corner of the Users and Applications panel on the right of the Management Console. You can also add a user by clicking the Add new user or application item in the Users and applications menu (Figure 1).
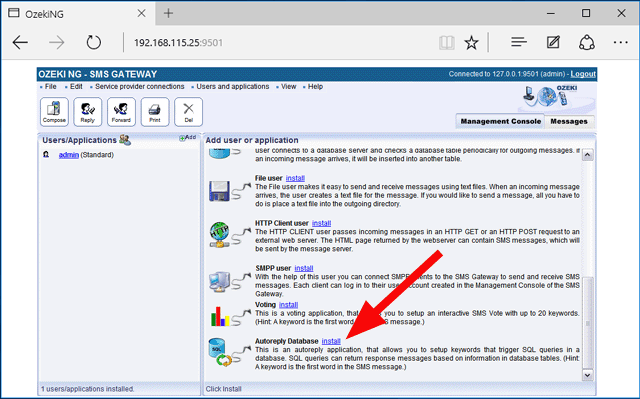
This will bring up an interface consisting of two panels. The panel on the left contains a list of users that have been installed. In the bar at the bottom of the page you can read how many users have been installed. The panel on the right contains a list of users that can be installed. Each user in the left-hand panel is listed with a unique name (and the user type stated in brackets). Each user in the right-hand panel is listed with the name of its type and a brief description of what it can be used for. To add an SMPP user, click the Install link in the respective entry in the list (Figure 2).
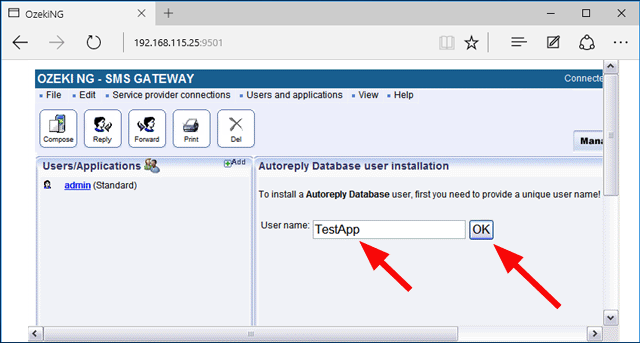
Now provide a unique name for the user to be installed (Figure 3).
The Configuration panel appears. If you are content with the default settings, you can leave this window unchanged and click on "OK" (Figure 4).
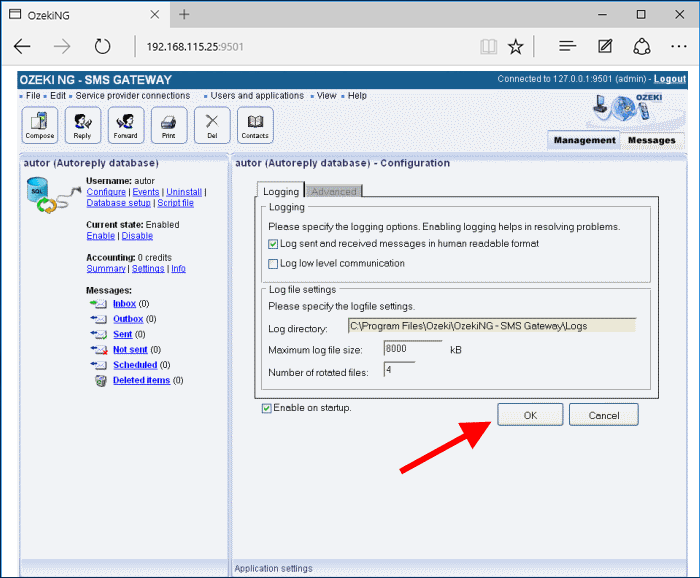
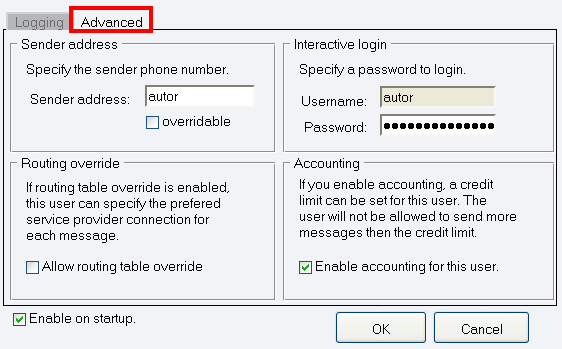
In Advanced tab you can specify the phone number of the sender, and you can provide a username and a password to login. In the lower section of this tab you can enable Allow routing table override option. If routing table override is enabled, this user can specify the preferred service provider connection for each message. You can also enable accounting for this user option. If you enable accounting, a credit limit can be set for this user. The user will not be allowed to send more messages then the credit limit.
