Accounting system configuration
Ozeki NG SMS Gateway has a built in accounting system, which can be used to set credit limits and to implement a cost control strategy when you use the gateway. This guide gives information on how you can configure and use the built-in accounting functionality.
Enabling accounting
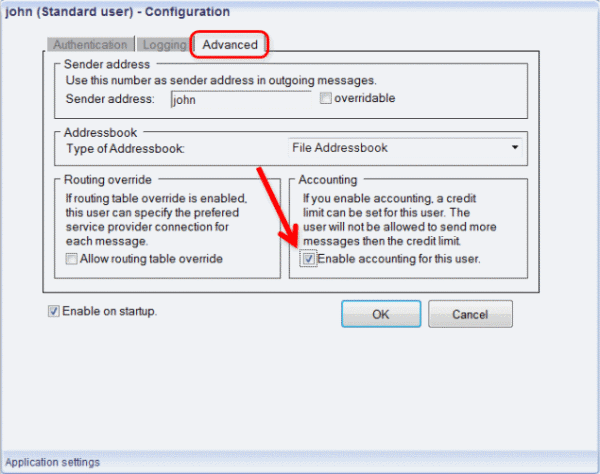
The accounting system can be enabled for the users of the system. To use it, you need to enable the accounting option for the appriopriate user account(s). This can be done by checking the "Enable accounting for this user" checkbox in the "Advanced" tab of the user configuration form (Figure 1).
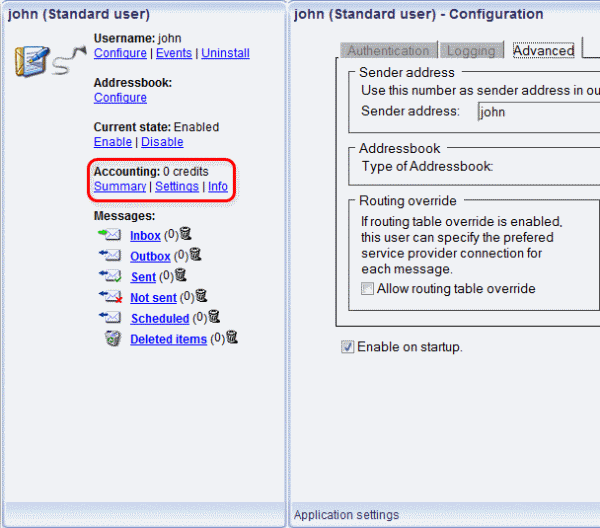
After you have enabled accounting you will see a new menu on the left side of the user's profile. There you can see how many credits the user has and there are menu items for configuring and viewing the user's accounting information (Figure 2).
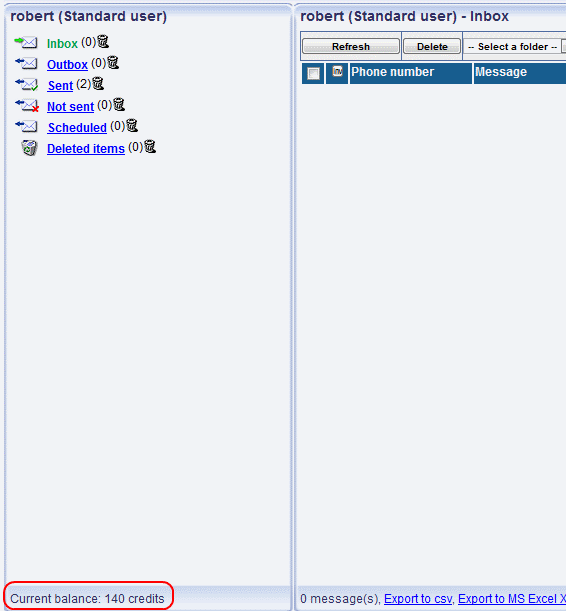
Users can check their credits after login under the left hand menu (Figure 3).
Accounting rules
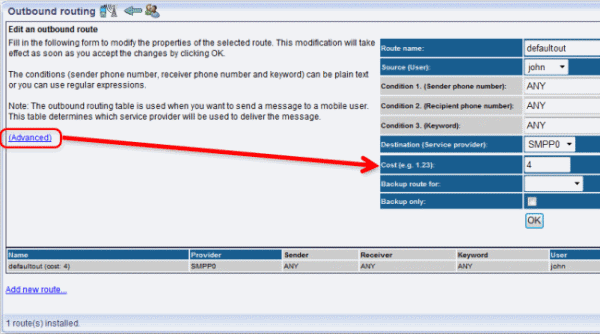
The accounting works the following way by default: 1 credit is deducted from the balance of the user whenever an SMS message is sent. 0 credit is deducted whenever a user recieves a message. To modify these values, you need to configure the route costs in the inbound and outbound routes forms (Figure 4).
You can read more about routes here:
Inbound routing
Outbound routing
Configuring accounting
There are 3 menus under the accounting menu of the users. These are "Summary", "Settings" and "Info" (Figure 2).
The "Summary" menu allows the administrator to view summaries about the users' accounts.
In the "Custom interval" section of the summary menu you can create summaries for intervals you typed in. In the rolldown menu you can select whether you want to see the summary about submitted messages, confirmed messages or both (Figure 5).
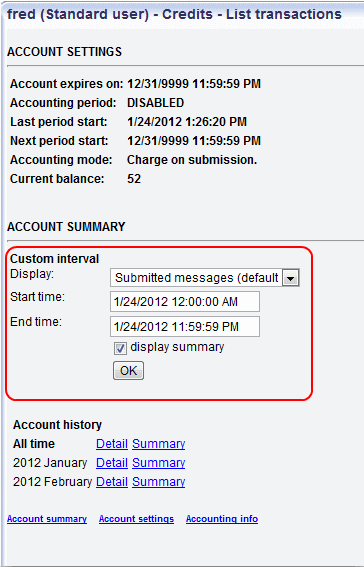
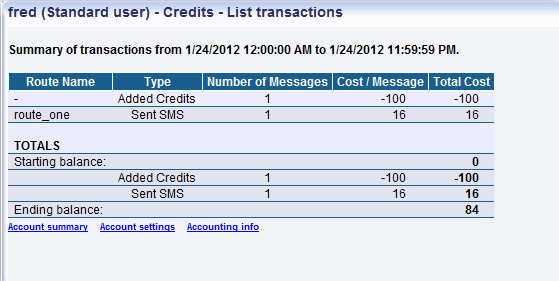
By clicking OK a summary appears showing details about the interval you typed in (Figure 6).
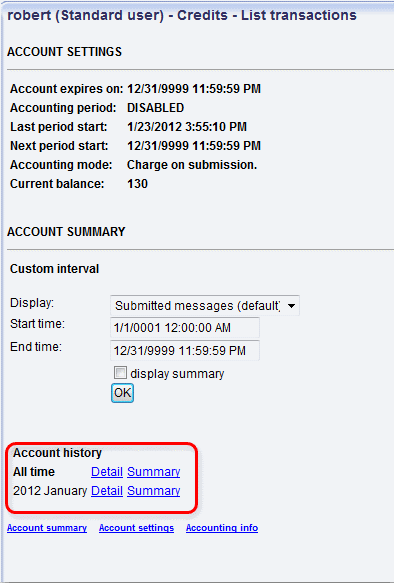
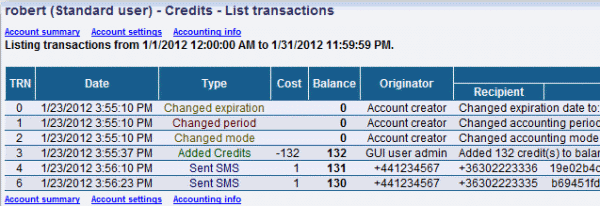
Under the "Custom interval" section, you can see an "Account history", where you can check detailed and simple summaries of last months, and all time (Figure 7 and 8).
In the "Settings" menu, you can change accounting configuration for the user.
At first, there is an option to simply top up or reduce the user's credits in the "Add credits" section (Figure 9).
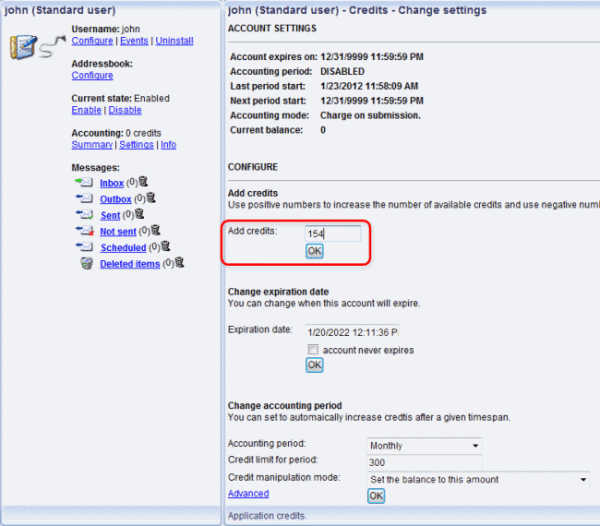
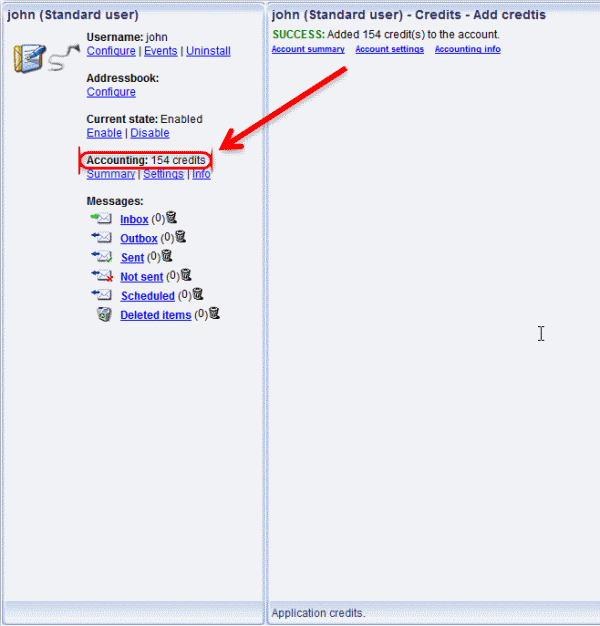
This is a one time change for the user's credits. If you enter a positive number, it will be added to the users credits. Negative numbers will be reduced from the users credits. For example if you type in 154 as Figure 9 shows, then you will add 154 credits to the users balance (Figure 10).
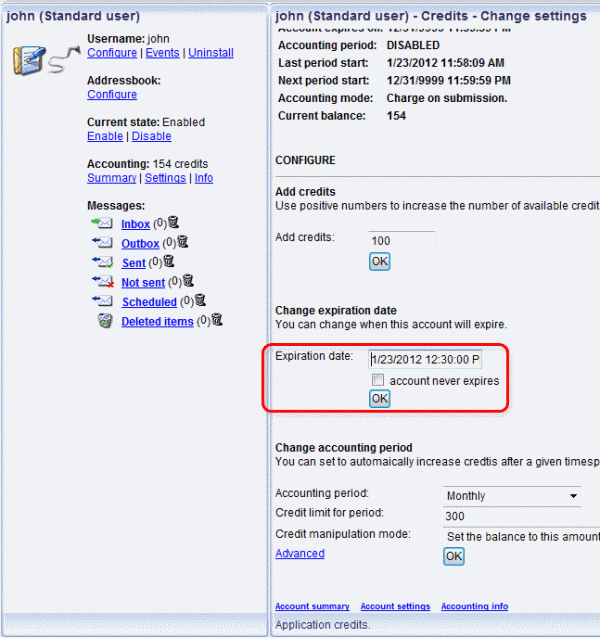
If you set an expiration date for the user, it will cause the following: if the date and time reaches the user's expiration date the user will be unable to send any messages after that time. By checking in the "account never expires" checkbox that means that this account will never expire.
The account info section shows information about the expiration date and writes out whether the account has been expired (more about this later) (Figure 12).
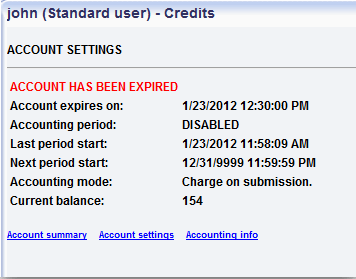
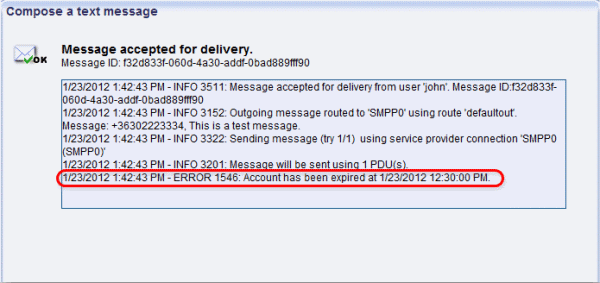
The user will see an error message when he tries to send a message with expired account (Figure 13).
The last section "Change accounting period" serves the creation of accounting periods. You can set the account to automatically increase credits after a given timespan(Figure 14).
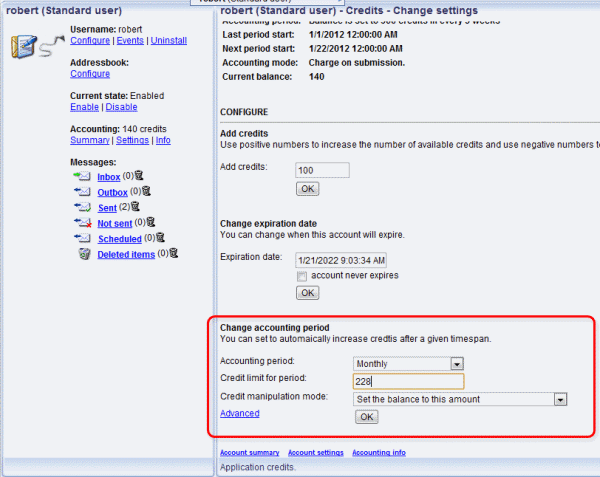
There is a simple form to do that, and there are some advanced options you can set by clicking the advanced button.
In the simple form, you can set an "Accounting period" - this can be "Daily", "Monthly", "Weekly", "Yearly" or you can "Disable" it. The account will be updated according to this period.
The next text box is the "Credit limit for period". You must type in a number here, and the last rolldown menu called "Credit manipulation mode" will define how this value will be used. There are 3 options in the "Credit manipulation mode" menu. "Add this amount to the balance" means that the credit limit will be added to the users balance during the period. "Set the balance to this amount if the balance is below" means that if the user's balance is below the credit limit, then the user's balance will be set to this limit value during the period. "Set the balance to this amount" means that the users balance will be set to the credit limit value every period.
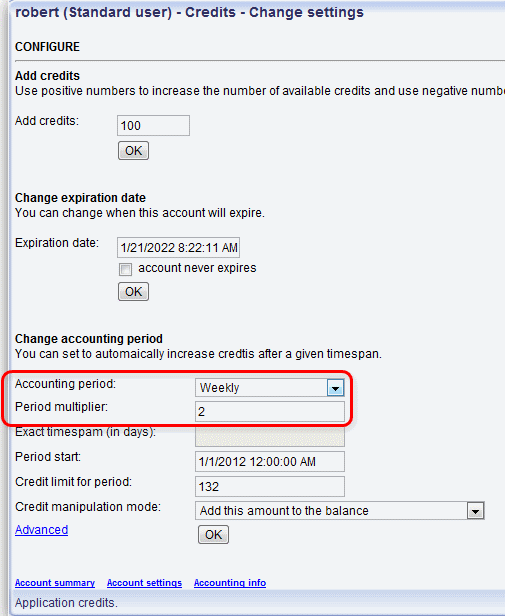
If you click the "Advanced" button, you can set in a "Period multiplier". With this option you can change the period to every 2 weeks for example (Figure 15). Here you can set a date and time too for the period start date - this can be a date in the past too.
By choosing the "Info" menu, you can check the user's current accounting configuration (Figure 16).
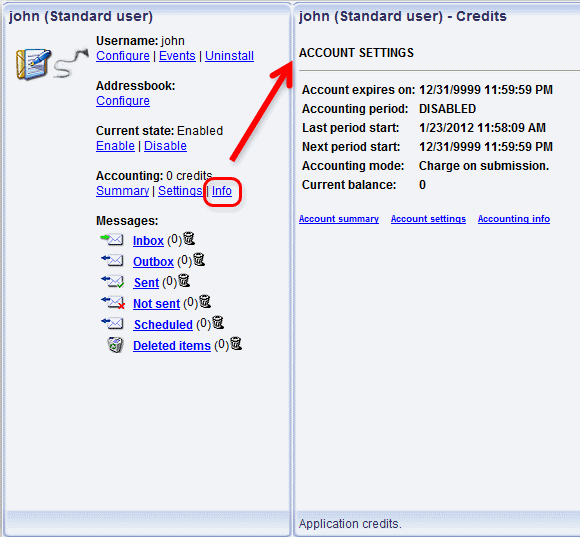
This info shows whether the account is expired, when will it expire, does it have an accounting period set - under that, you can see the last and next periods' starting time. Here you can check the user's accounting mode and current balance too. Every accounting menu has this info box on the top.
For more information please contact us at info@ozekisms.com.
