MSSQL Server 2012/2014 Connection
In this article you will find detailed information on how to send SMS text messages from MSSQL Server 2012/2014 with the help of Ozeki NG SMS Gateway. Ozeki NG SMS Gateway needs to be downloaded and installed on your computer to provide SMS functionality to your database.
If you have installed Ozeki NG SMS Gateway software on your computer, then you can start to setup your SMS system. To send SMS messages from MSSQL Server 2012/2014 you need to do the follows: First create a database and then create two database tables in this created database for the outgoing and incoming messages: "ozekimessageout" and "ozekimessagein" in MS SQL. Then you need to configure Ozeki NG SMS Gateway to connect to the database and use these database tables for sending and receiving SMS messages. After the configuration you can start to send messages by inserting a record into "ozekimessageout" database table using an SQL INSERT. Ozeki NG SMS Gateway reads this record with the help of an SQL SELECT and it will send out your message as an SMS to mobile phones. It uses a GSM modem attached to the PC or it connects directly to the SMS centre of the mobile service provider over the Internet (IP SMS).
Create database tables in MSSQL 2012/2014
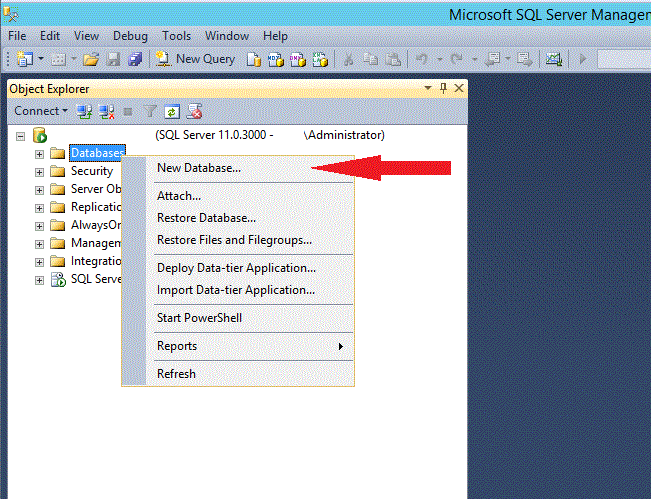
Start "SQL Server Management Studio" at Start / All programs / Microsoft SQL Server 2012/2014 / SQL Server Management Studio. Then log into MSSQL Server with your username and password that you usually use for authentication in Windows. Now right click on "Database" menu item and "New Database" (Figure 1).
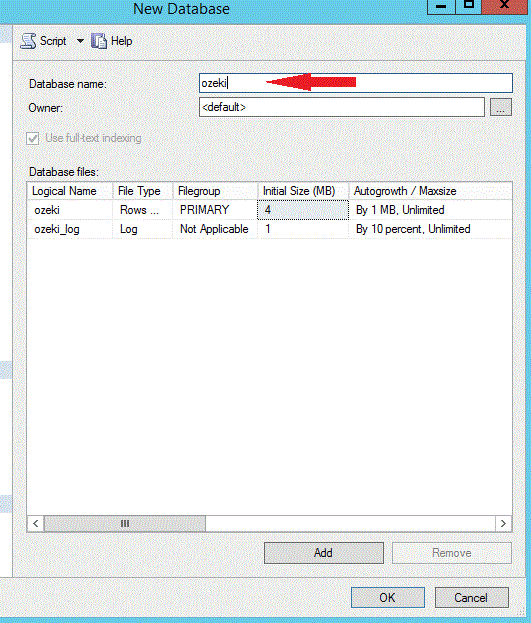
Provide a name for this new database (in our example it is "ozeki") and click on "OK" (Figure 2).
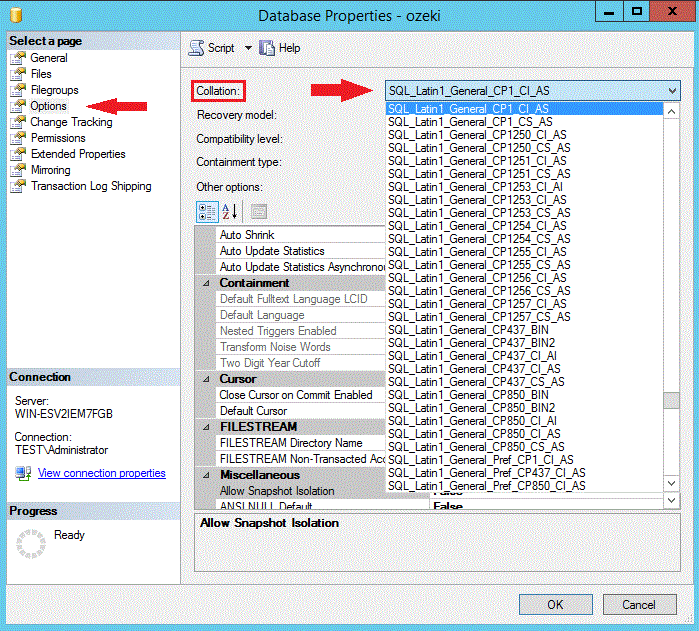
You can specify international coding if you right click on the database and select "Properties". On the left side click on "Options" and set "Collation" field to your country (Figure 3).
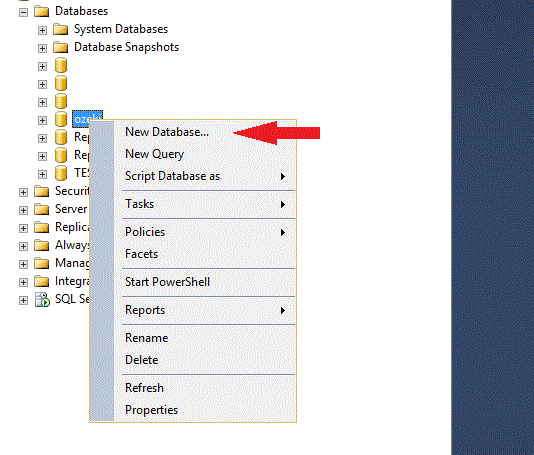
Next, right click on the created database and select "New Query" (Figure 4).
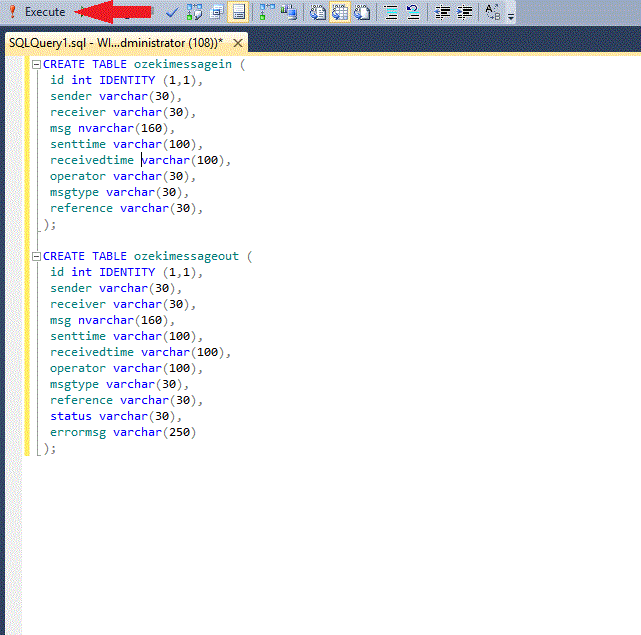
Copy the database tables script from this page and click on "Execute" (Figure 5) and (Figure 6).
Database table script:
CREATE TABLE ozekimessagein (
 id int IDENTITY (1,1),
 sender varchar(255),
 receiver varchar(255),
 msg nvarchar(160),
 senttime varchar(100),
 receivedtime varchar(100),
 operator varchar(30),
 msgtype varchar(30),
 reference varchar(30),
 );
CREATE TABLE ozekimessageout ( id int IDENTITY (1,1), sender varchar(255), receiver varchar(255), msg nvarchar(160), senttime varchar(100), receivedtime varchar(100), operator varchar(100), msgtype varchar(30), reference varchar(30), status varchar(30), errormsg varchar(250) ); |
If it is done, close "SQL Server Management Studio".
Create a database user in Ozeki NG SMS Gateway
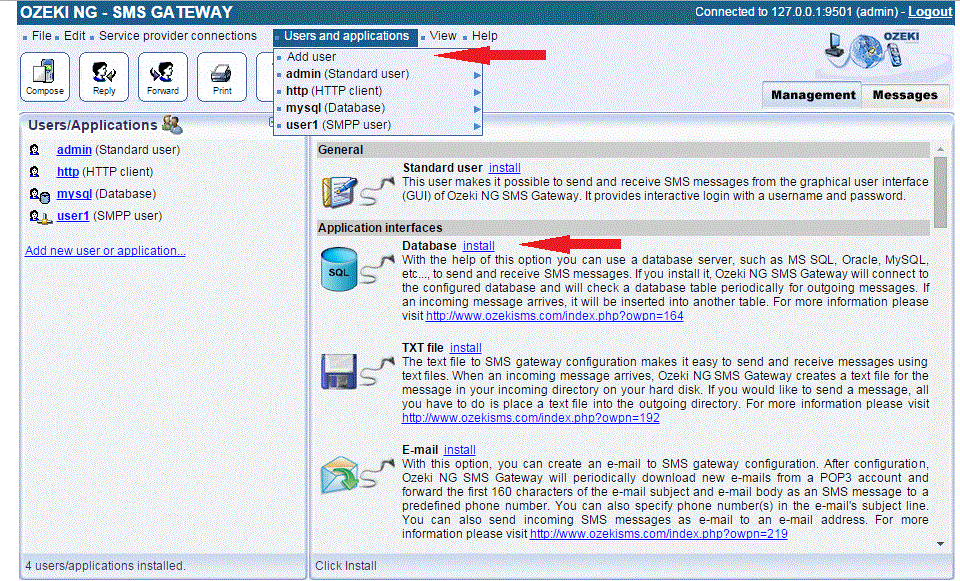
To create a database user in Ozeki NG SMS Gateway, first you need to log into the gateway software. Then go to "Add new user or application". Select "Database user" and click on "Install" next to it (Figure 7).
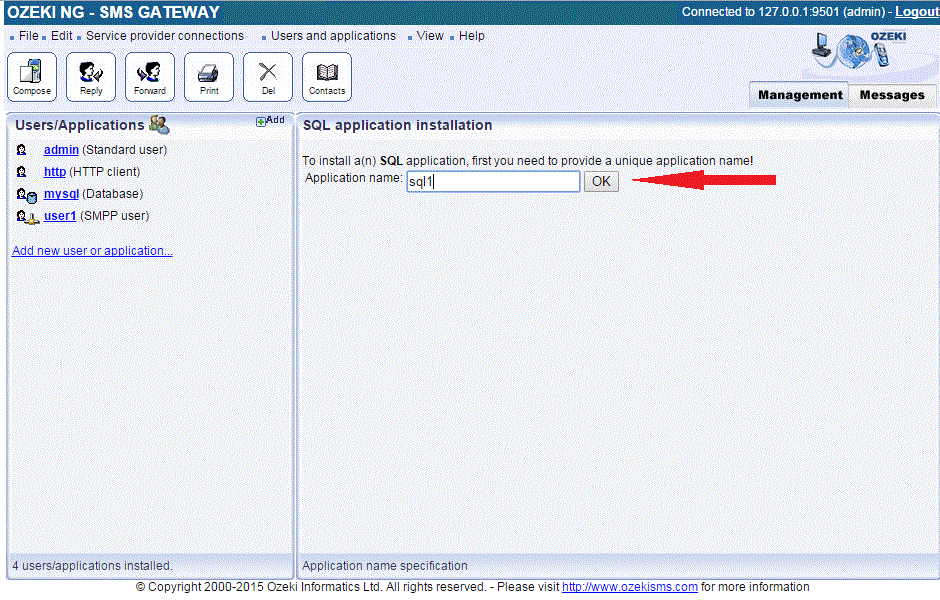
Provide a name for this user (Figure 8).
Configure the database connection for this SQL user in Ozeki NG SMS Gateway
To set up this database connection, select the connection string type.
| OleDb |
Then customize the following connection string:
| Provider=SQLNCLI11;Server=ServerAddress;Database=DatabaseName;Uid=UserName;Pwd=Password; |
Figure 9 is an example for a customized connection string.

You can test this created connection if you click on "SQL Prompt" and you select from the dropdown menu:
| INSERT INTO ozekimessageout (receiver,msg,status) VALUES ('+36205460691','Hello World','send'); |
After a short period of time, Ozeki NG SMS Gateway will notice the new row and send out your message.
Related pages:
