How to change frequency in Sierra GSM modems
Download Hyper TerminalThis guide will help you change the frequency when you use a Sierra Fastrack GSM modem. It is useful if your service provider uses another frequency than 900/1800 MHz. In this guide you can see how to change the frequency from 900/1800 MHz to 850/1900 MHz. However, other options are also listed in the tables below.
If you use GSM modem for connecting to the mobile network, it can occur that your service provider uses other frequency than the default frequency in the Sierra modem. This default frequency in Sierra Fastrack Xtend GSM modems is 900/1800 MHz.
So before you start to use the GSM modem it is highly recommended to ask your service provider about the used frequency. If they use other frequency than the default 900/1800 MHz, you need to set the GSM modem to the used frequency.
Sierra Fastrack Xtend modems supports the following frequencies: 850, 900, 1800, 1900. You can set the frequency by using AT commands in the modem.
Please follow this guide to change the frequency range of your Sierra Fastrack modem effectively.
It is assumed that Ozeki NG SMS Gateway and a Sierra Fastrack Xtend modem has already been installed to your PC.
First, please stop the Ozeki NG SMS Gateway service by clicking on Stop service (Figure 1).

On Figure 2 you can see the message if the Ozeki NG SMS Gateway software has stopped.

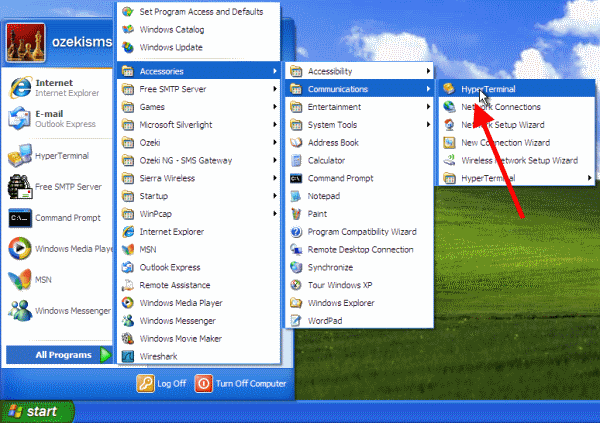
Now start Hyperterminal at Start / Accessories / Communications / Hyperterminal (Figure 3). Please note that if you use Windows Vista or newer operating system, you need to download Hyperterminal. You can download Hperterminal from the following website: http://www.hilgraeve.com/htpe/download.html
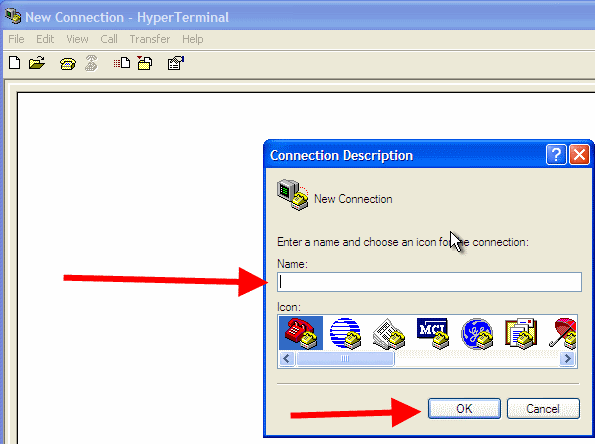
Create a new connection and provide a name for this connection (Figure 4). Click on OK
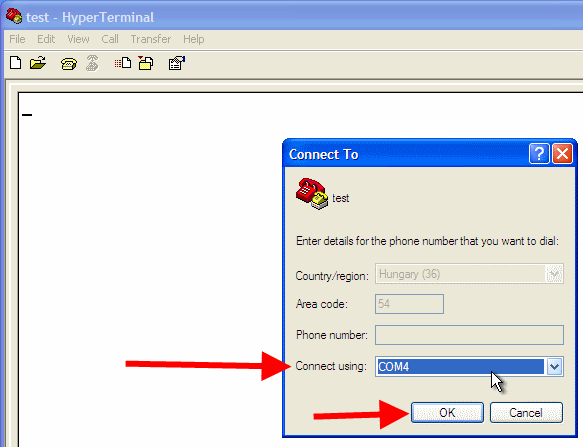
Select the port that is used by the GSM modem at Connect using drop down menu (Figure 5).
Select the speed at Bits per second drop down menu. Set it to 115200 (Figure 6). Click on OK.
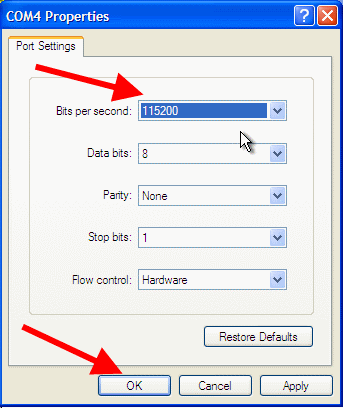
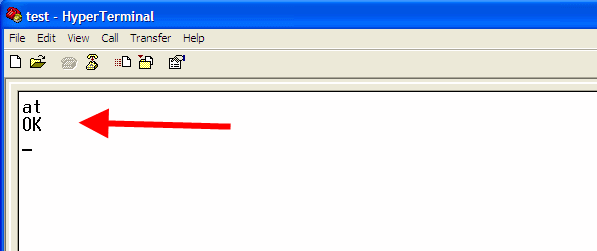
Check if the connection is successful by typing at command into Hyperterminal. If it returns OK, the connection is successful (Figure 7).
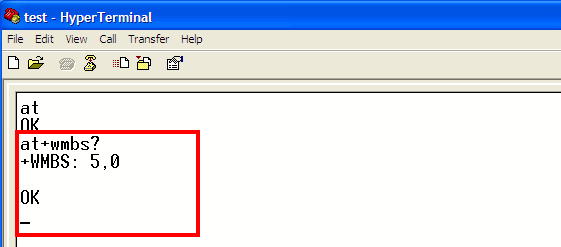
Now issue at+wmbs? command to check the frequency. The return values of this command can be the follows:
Return values for at+wmbs? command:
| Return value | Description |
|---|---|
| +WMBS: 0,x | Mono band mode 850 MHz is selected |
| +WMBS: 1,x | Mono band mode extended 900 MHz is selected |
| +WMBS: 2,x | Mono band mode 1800 MHz is selected |
| +WMBS: 3,x | Mono band mode 1900 MHz is selected |
| +WMBS: 4,x | Dual band mode 850/1900 MHz is selected |
| +WMBS: 5,x | Dual band mode extended 900/1800 MHz is selected |
| +WMBS: 6,x | Dual band mode extended 900/1900 MHz is selected |
As you can see at Figure 8 the GSM modem returns +WMBS: 5,0 meaning that it uses 900/1800mhz by default.
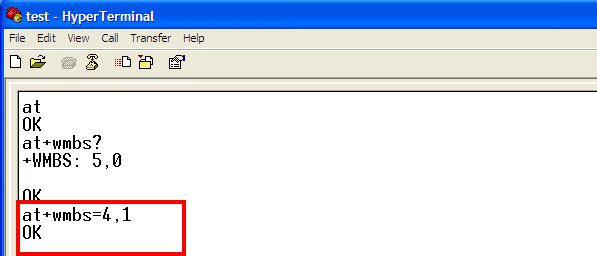
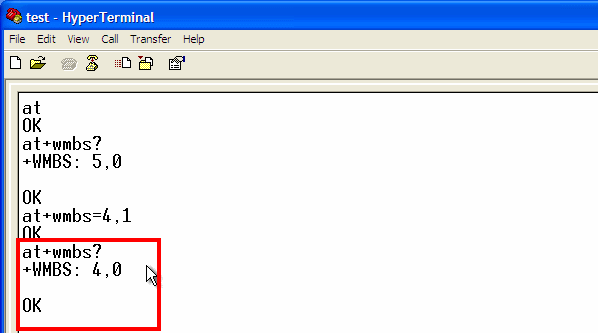
If you issue at+wmbs=4,1 the frequency will be change to 850/1900mhz. If OK is returned the change has been successful (Figure 9).
Possible Commands:
| Command | Description |
|---|---|
| AT+WMBS=0,x | Select mono band mode 850 MHz |
| AT+WMBS=1,x | Select mono band mode extend 900 MHz |
| AT+WMBS=2,x | Select mono band mode 1800 MHz |
| AT+WMBS=3,x | Select mono band mode 1900 MHz |
| AT+WMBS=4,x | Select dual band mode 850/1900 MHz |
| AT+WMBS=5,x | Select dual band mode extend 900/1800 MHz |
| AT+WMBS=6,x | Select dual band mode extend 900/1900 MHz |
- x=0 : The Plug & Play will have to be reset to start on specified band(s).
- x=1 : The change is effective immediately. This mode is forbidden while in communication and during Plug & Play initialization.
You can also check of the change has been successful by at+wmbs? command. If the return value is +WMBS: 4,0 then the frequency has been set to 850/1900 MHz successfully (Figure 10).
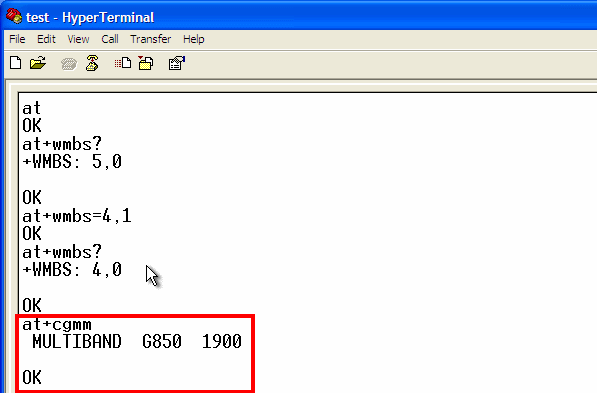
You can also check the changed frequency by at+cgmm command. In this case the frequency will be shown in text: MULTIBAND G850 1900 (Figure 11).
Now start the Ozeki service by clicking on Start service (Figure 12).

Click on Manage/Configure option to configure Ozeki NG SMS Gateway (Figure 13).

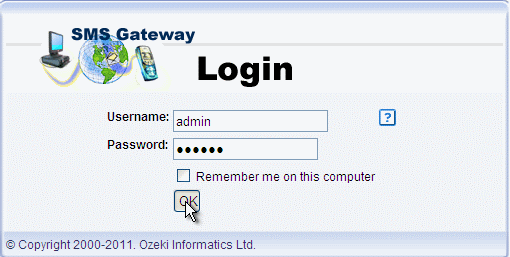
Log into Ozeki NG SMS Gateway with your username and password (Figure 14).
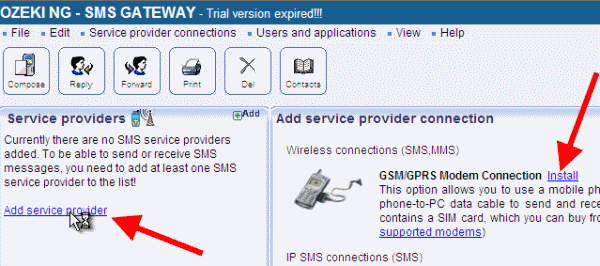
If you have not installed a GSM modem connection in Ozeki NG SMS Gateway, then click on Add service provider. In list select GSM/GPRS modem connection and click on Install next to it (Figure 15).
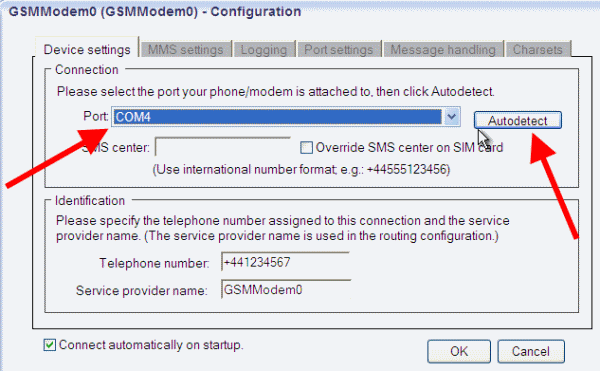
On the configuration panel of GSM modem connection select the port at Port drop down menu and click on Autodetect (Figure 16).
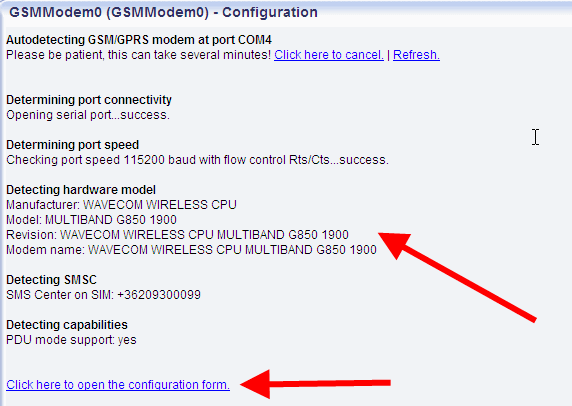
On Figure 17 you can see that the GSM modem has been detected successfully. Click on Click here to open the configuration form link.
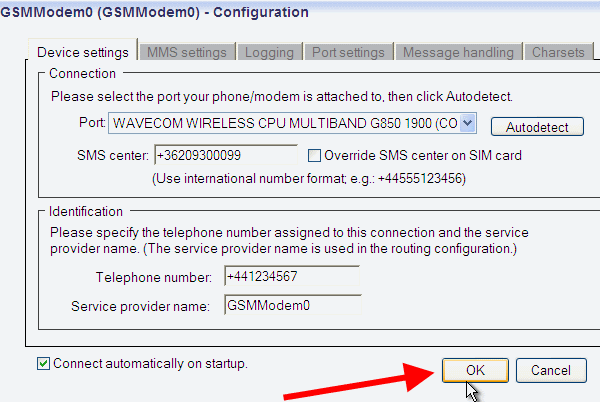
On the configuration panel of the GSM modem click on OK to save the changes (Figure 18).
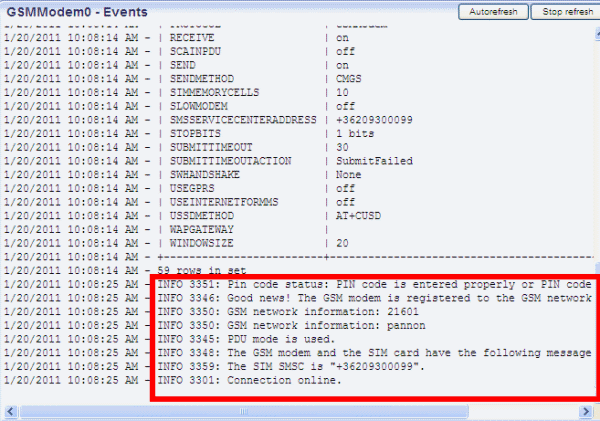
If you have followed this guide, you can check in Events menu of the GSM modem connection that 'The GSM modem is registered to the network' and the 'connection is online' (Figure 19).
